|
ARTICLE MENU
|
M4/3 System
(16th December 2016)
1. Off
Centre Lens Optics & Sensor
Alignment Testing
for problems mostly
encountered when using ‘fast’ lenses wide open.
(Test procedure devised by and article © Adrian Harris)
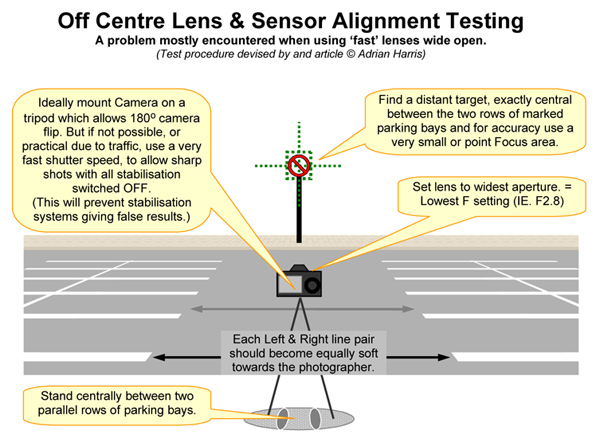
Test Method for Handholding
Camera:
- Set lens to wide open = fastest
aperture.
(IE. Lowest f number. Example: f2.8,
not f8. As using a small aperture such as f8 or f11 will disguise
lens and camera sensor alignment faults).
- Ensure shutter speed = minimum of
2 x equivalent FF focal length.
(On M43, 20mm = 40mm FF = 1/80th. The
faster the shutter speed used for the test the better, but stay
within reasonable ISO limits to prevent a poor image.)
- Turn OFF all stabilisation.
(Stabilisation could cause erroneous
test results.)
- Set camera to the smallest focus
square or point, and set it central.
(This will help prevent focus
errors).
- Stand firmly, brace your arms
against chest, hold breath, aim carefully at the target point and
fire off a short burst of shots.
(I use a series of 4 to 6 photos*
to ensure I get at least one good image in case of camera user
error!)
- Now turn the camera upside down
by inverting it 180 degrees. Focus on the exact same point and shoot
of another burst - easier said than done!
(If there are any obvious
misalignment faults, inverting the camera should appear to move any
visual discrepancies to their diametrically opposite side.)
Method if Camera on Tripod :
Only practical if you have a suitable tripod/head
that will
allow 180o inversion…
- Prepare camera as in 1 - 4 above.
(Using a 2sec timer delay or a remote
shutter control will allow better images from slower shutter speeds
if desired.)
- No need for a long burst if using
a tripod, but is always wise to take a couple of shots – just in
case.
- Invert camera as in 6 above and
repeat the test, again taking great care to focus on the exact same
spot.
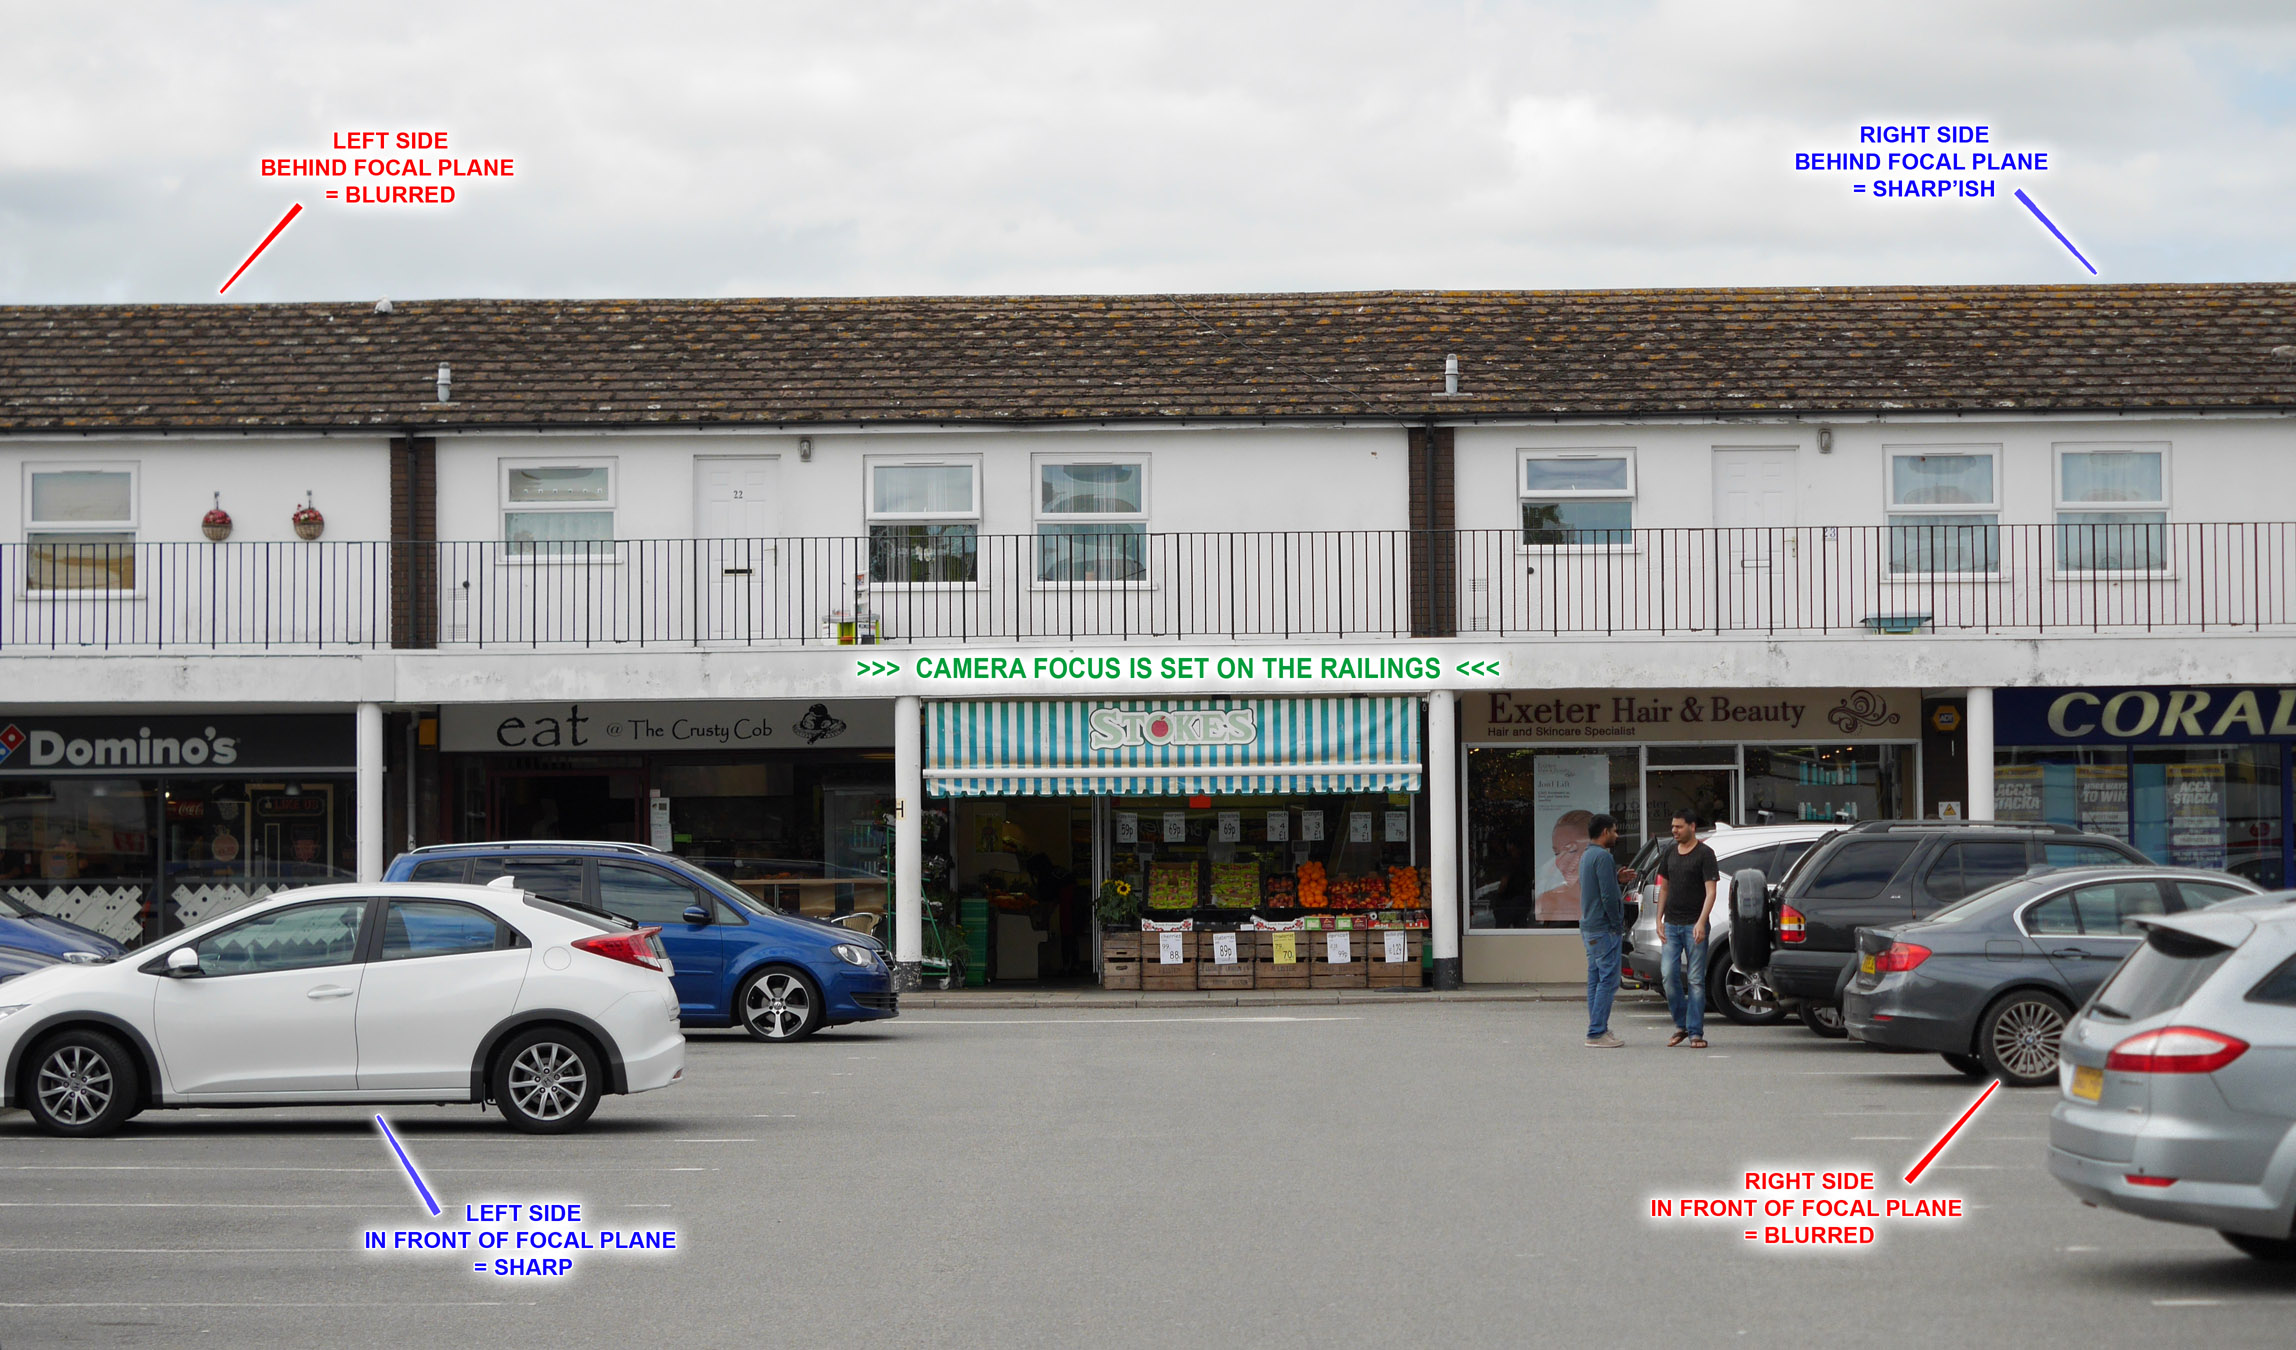
Examination:
 Turn the inverted images the correct way around to Check Results. Turn the inverted images the correct way around to Check Results.
Using the best image from each
inversion, compare the two images
for any left-right, and top-bottom
sharpness discrepancies.
Differences would indicate a lens or
sensor misalignment. To check which may be at fault, repeat the tests
using another fast lens on the camera, and if you can borrow one from a
friend, try another camera with the lens.
Important Note:
- If testing a suspect zoom lens,
repeat above test at different focal lengths.
- To ensure the camera focus is
EXACTLY the same when inverted, it may be best to use fully manual
focus control – but take care NOT to knock the focus control ring !
- *
EXIF data does not indicate whether stabilisation is On or Off, so
if you do this test and also are comparing the effects of
stabilisation versus no stabilisation, ensure you make note of the
number of shots taken in each sequence!
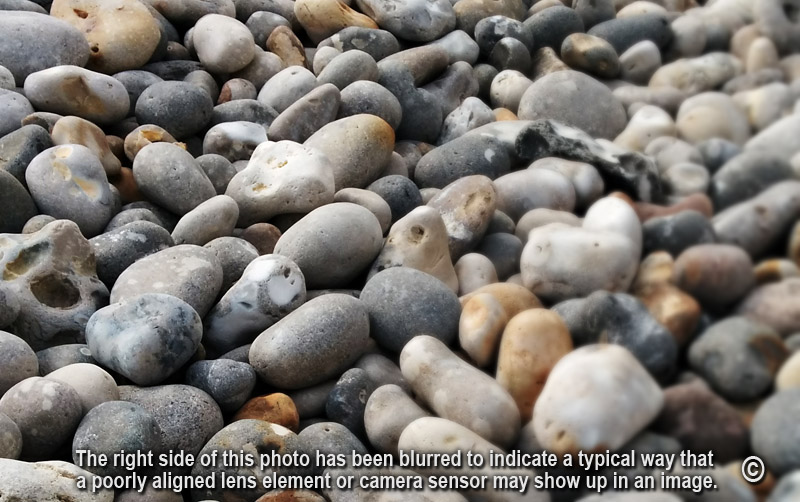
Real World Test - Example of lens
with a Squint Fault:
Click to view a larger photo to examine.
1.
Off-Centre Lens & Sensor Alignment Testing.
(tests for lens optics and camera sensor alignment faults).
2.
Lens and Stabilisation - Sharpness Testing.
(tests for lens sharpness and image stabilisation issues).
3.
Front Focus & Back Focus Testing.
(tests for focus alignment setup accuracy between the camera and lens.)
Article ©
Adrian Harris
|
|
 |