|
|
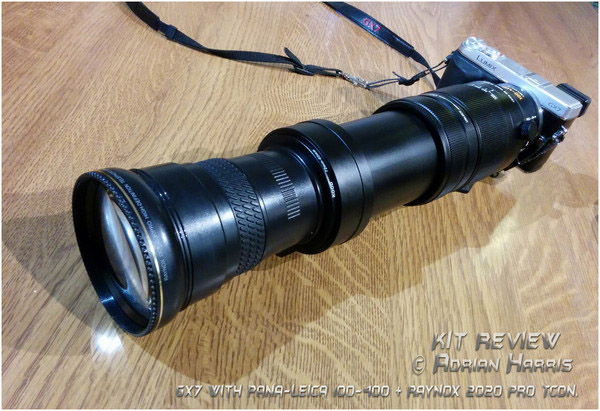
M4/3 System - Lens Evaluation
Seriously Long -
Raynox 2020 Pro 2.2x
Teleconverter. Purpose: To test if it is possible to further extend the telephoto reach of some of the longer Panasonic and Olympus M43 telephoto lenses - and particularly the Panasonic/Leica 100-400 lens, - for use in a practical working environment, and with useable results?
Lens Evaluation:
Raynox 2020 Pro (2.2x afocal teleconverter)
Lenses Used:
Cameras Used:
This is not a scientific lens test, all images displayed were taken during 'practical use' photography and thus will allow me to evaluate whether there is any benefit of using the Raynox 2.2x afocal teleconverter to multiply the available maximum optical zoom, when it is attached to the front of any of my current lenses. Of specific interest for maximum achievable reach for an autofocus M43 system, being when fitted to the Panasonic 100-400 lens. Which in theory if it works will provide a total 'Full Frame Equivalent' focal length of 1,760mm!
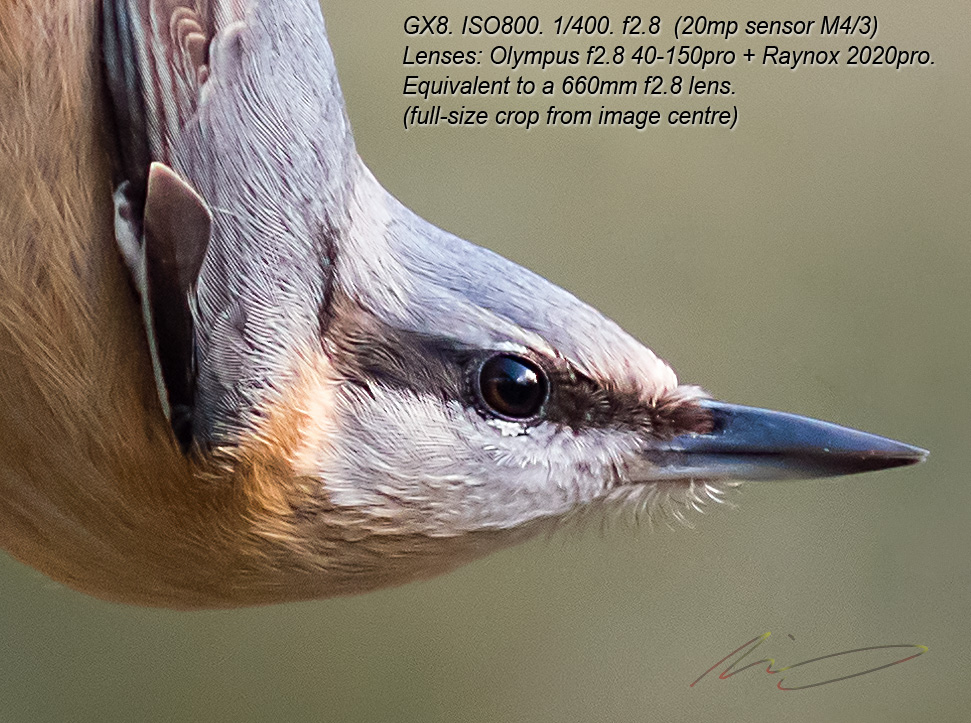
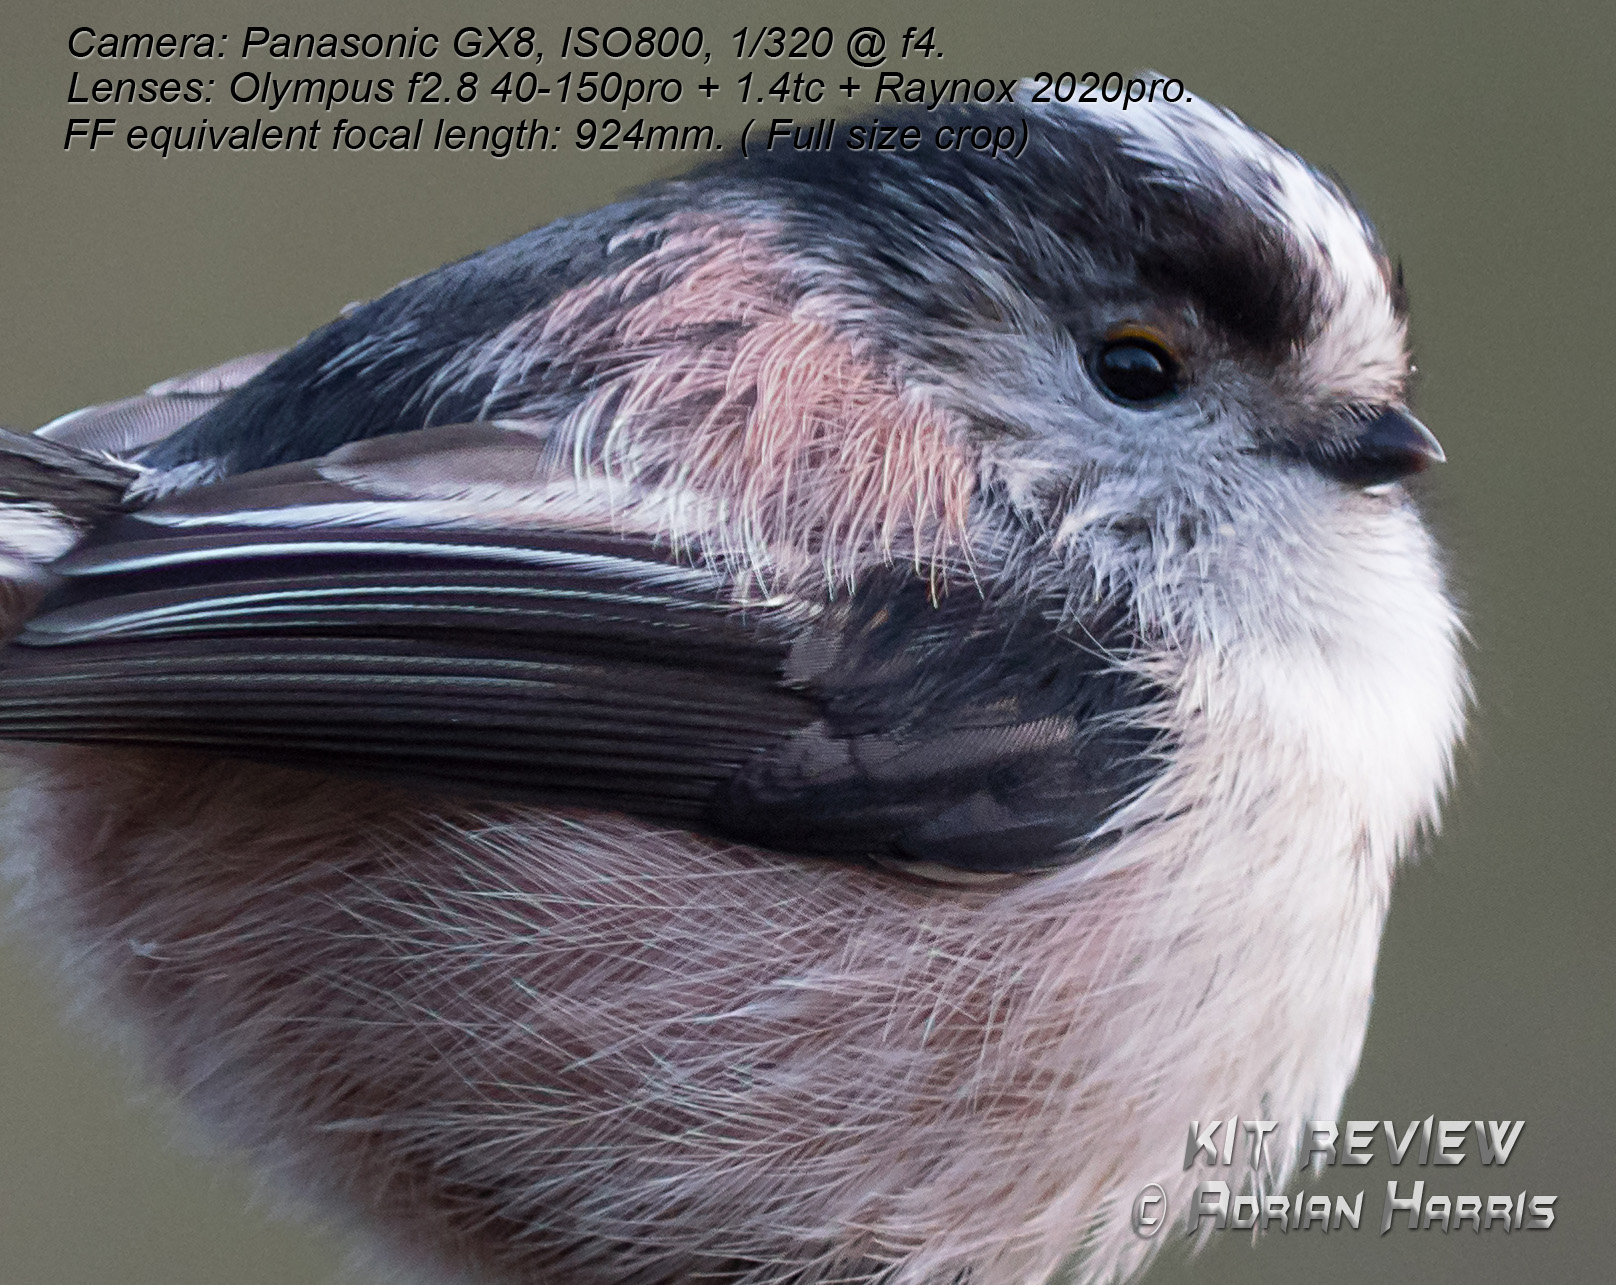
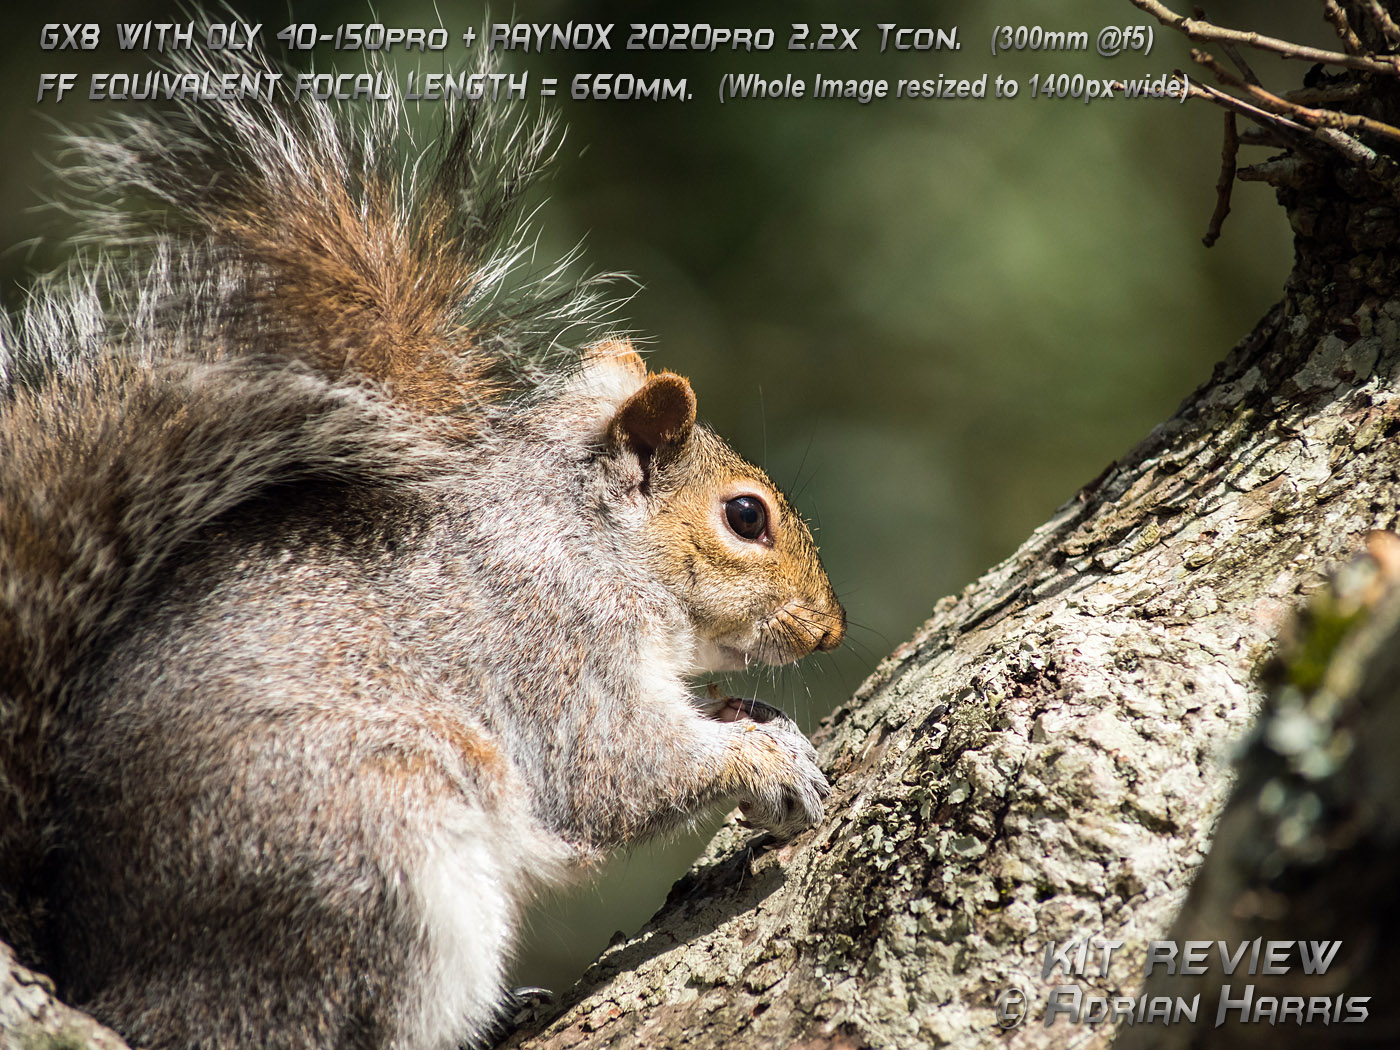
Let's get one thing clear from the start, I do not use a setup like this for Landscape photography. I use it for photographing small objects which are very far away, such as small distant birds which are too nervous to approach. So edge to edge performance is not the primary consideration, but sharpness and fast focusing is! Raynox 2020 + Olympus 40-150 Pro & also + the dedicated Olympus 1.4x TC: The following three Olympus 40-150 Pro examples were taken using a Panasonic GX8 camera with various lens combinations and settings as specified on the images. When clicking for larger examples: Please note that due to hosting space limitations, in most cases I have decided to present full size crops of the most relevant parts of each image. Where applicable whole images are also presented for viewing, but mainly at the UK national digital competition display size of 1400pixels wide.
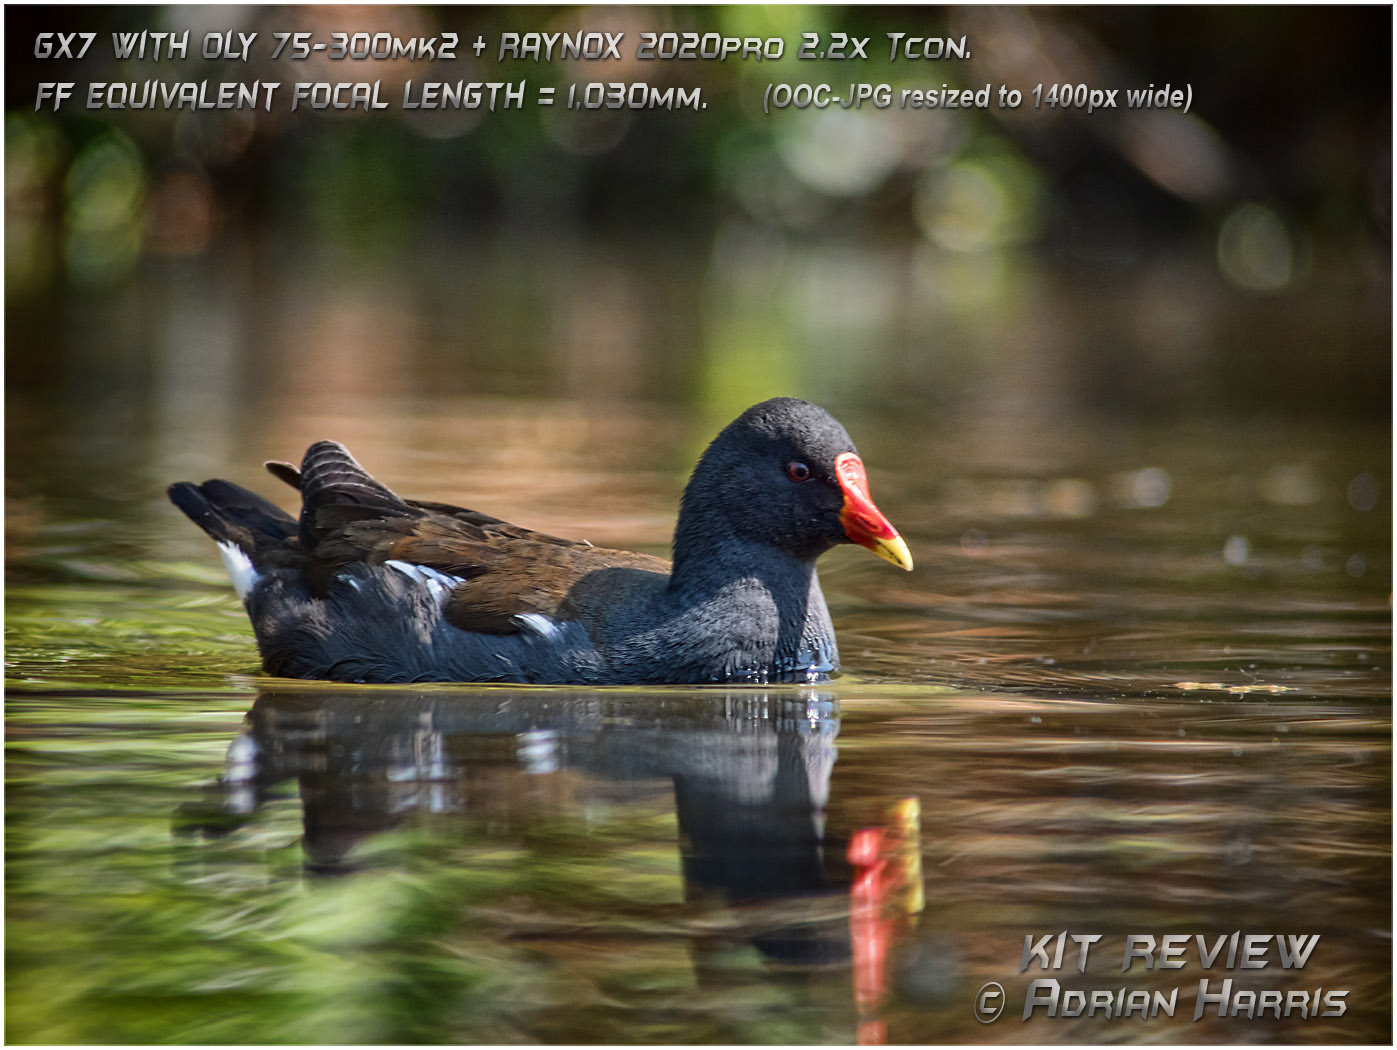
Conclusion: The Raynox 2020 pro when fitted to the stunning Olympus 40-150 pro, will produce very sharp pictures for the in-focus areas across most of the image frame. It must be remembered however that when the telephoto reach is increased, a much smaller range is in focus unless the lens is stopped down. There is always a tendency for the Raynox 2020 to produce Chromatic Aberration (CA) and also some Purple Fringing (PF), especially on highlights or out of focus high contrast areas in front of, or behind the subject. However this tends to be far less of an issue when fitted to this Olympus 40-150 pro than some other lenses. Even so, great care needs to be taken regarding subject and background when using this or any other 2020 combination. And for best results on certain types of images some post processing is essential. More on this later..... Raynox 2020 + Olympus 75-300 Mk2: The following two examples were taken using a Panasonic GX7 camera fitted with the Raynox 2020 attached to the Olympus 75-300 Mk2 lens, which was then used at various focal length combinations as specified on the images.
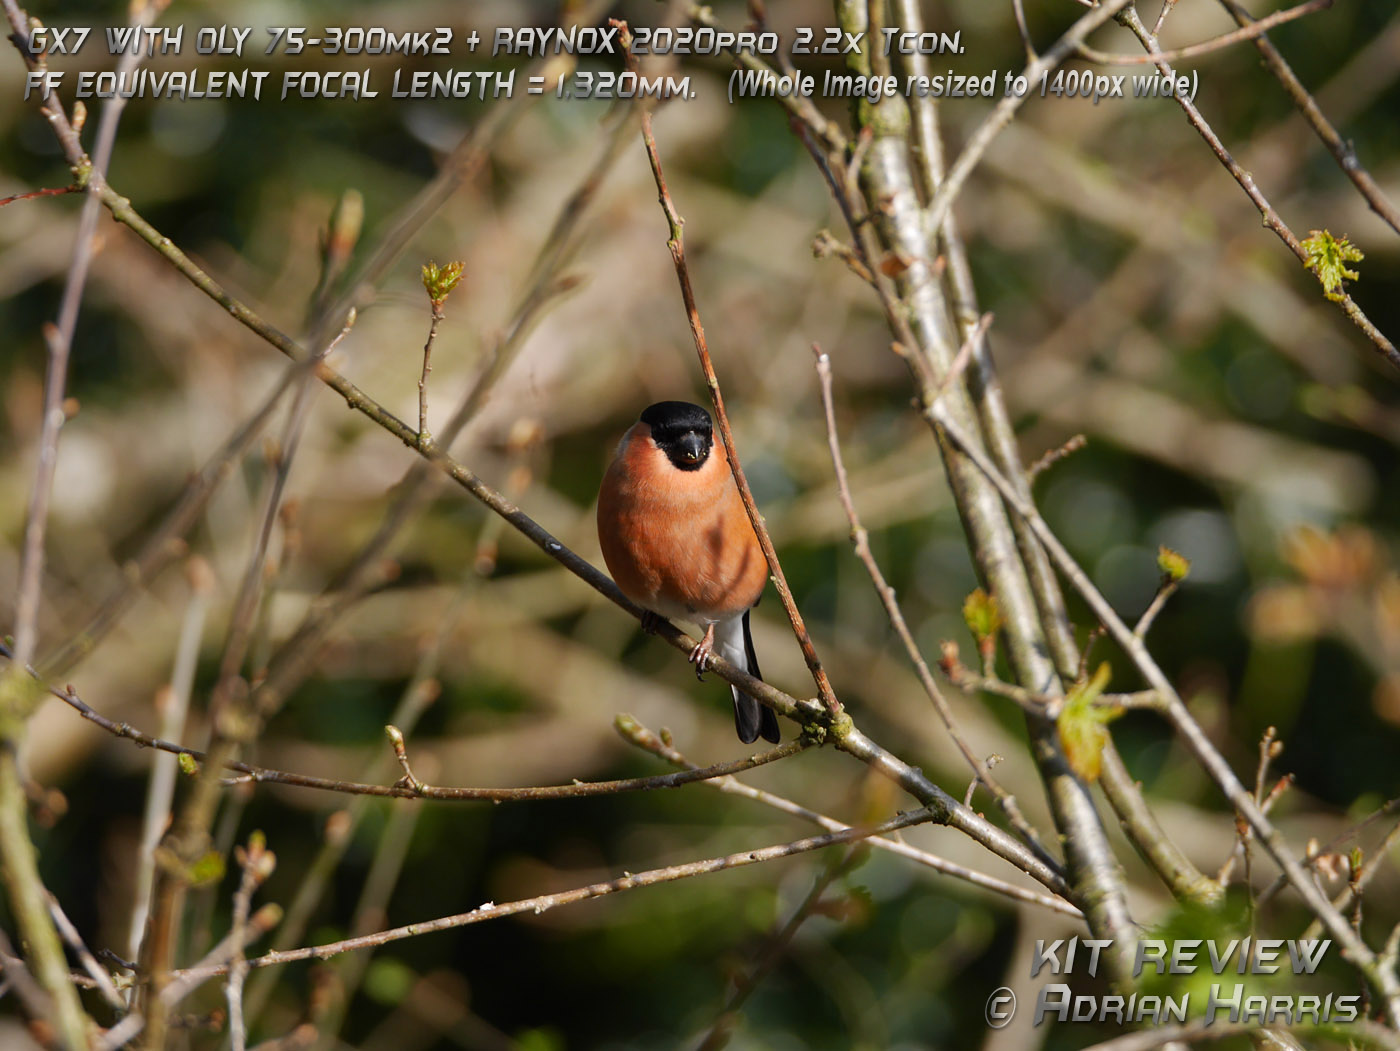
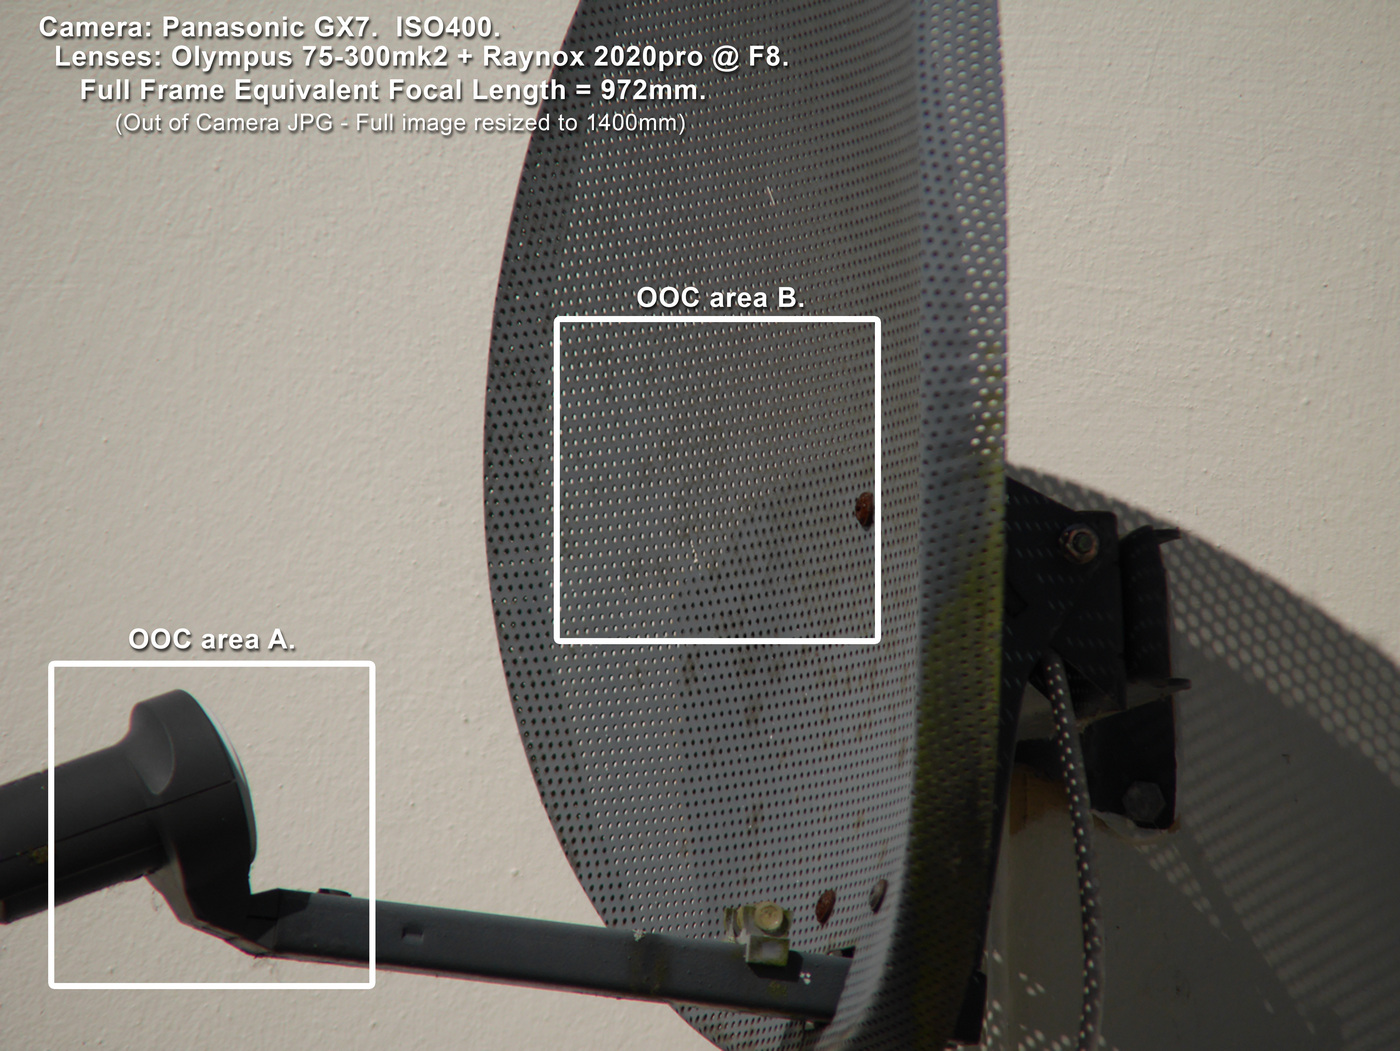
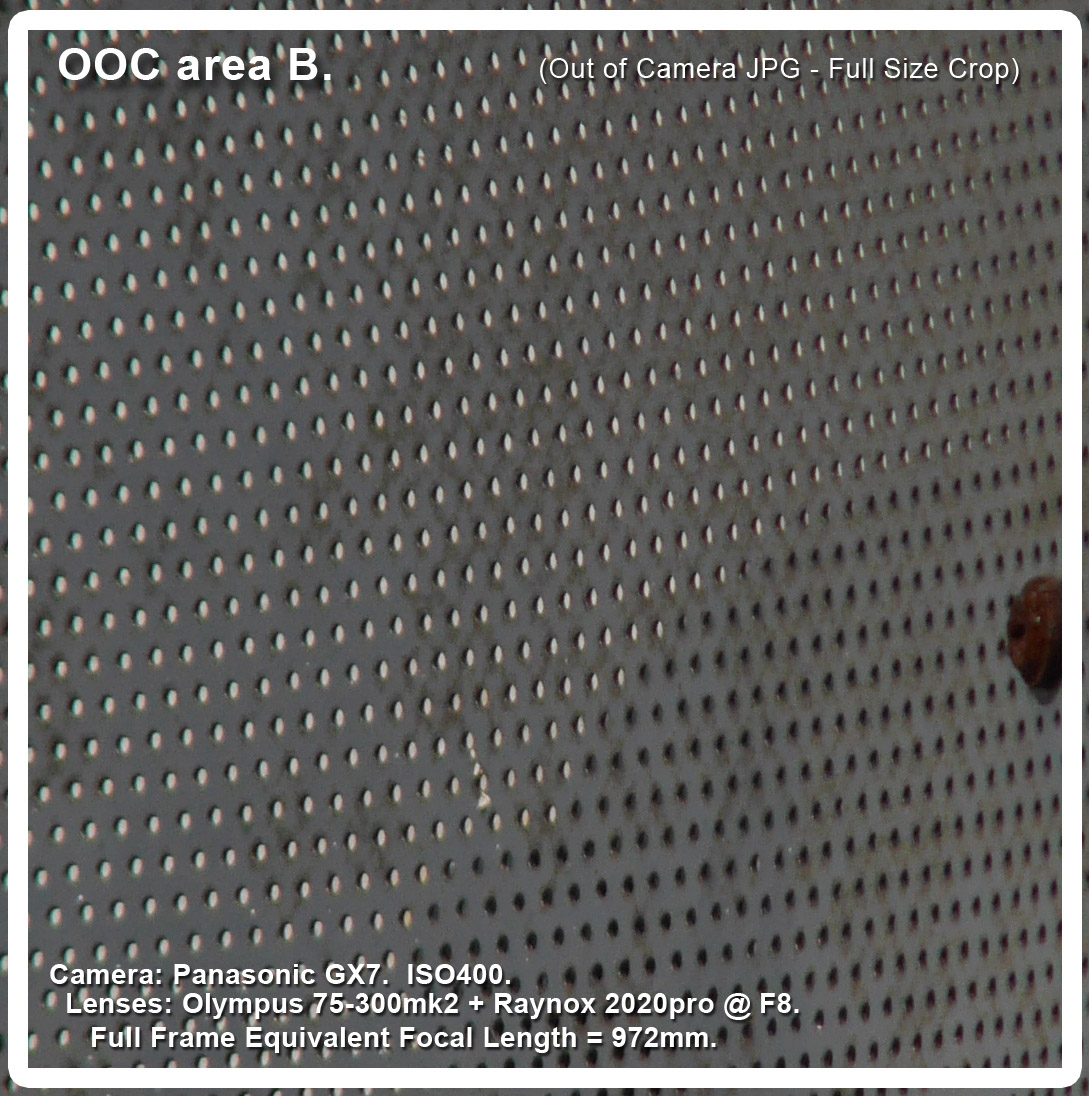
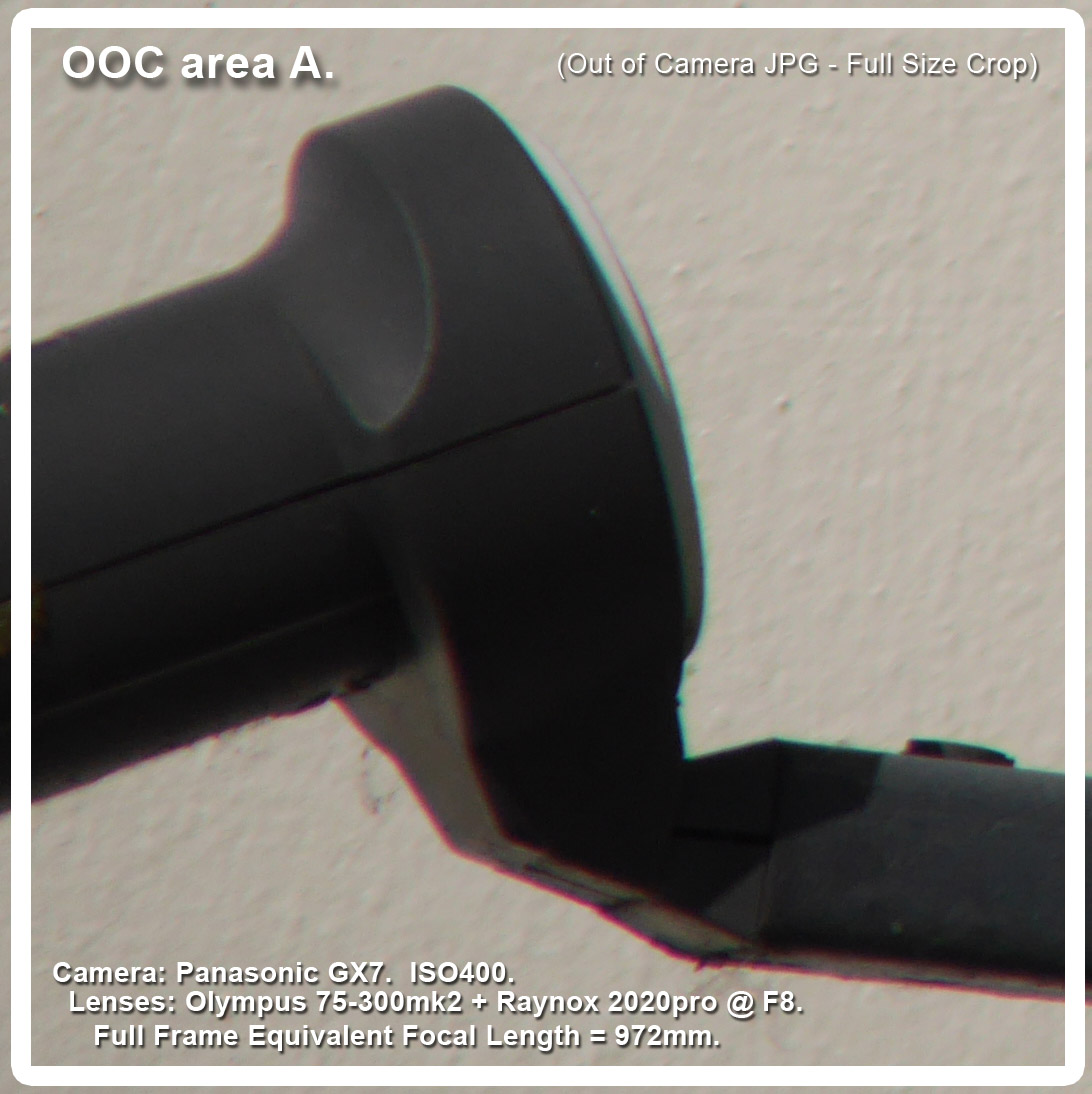
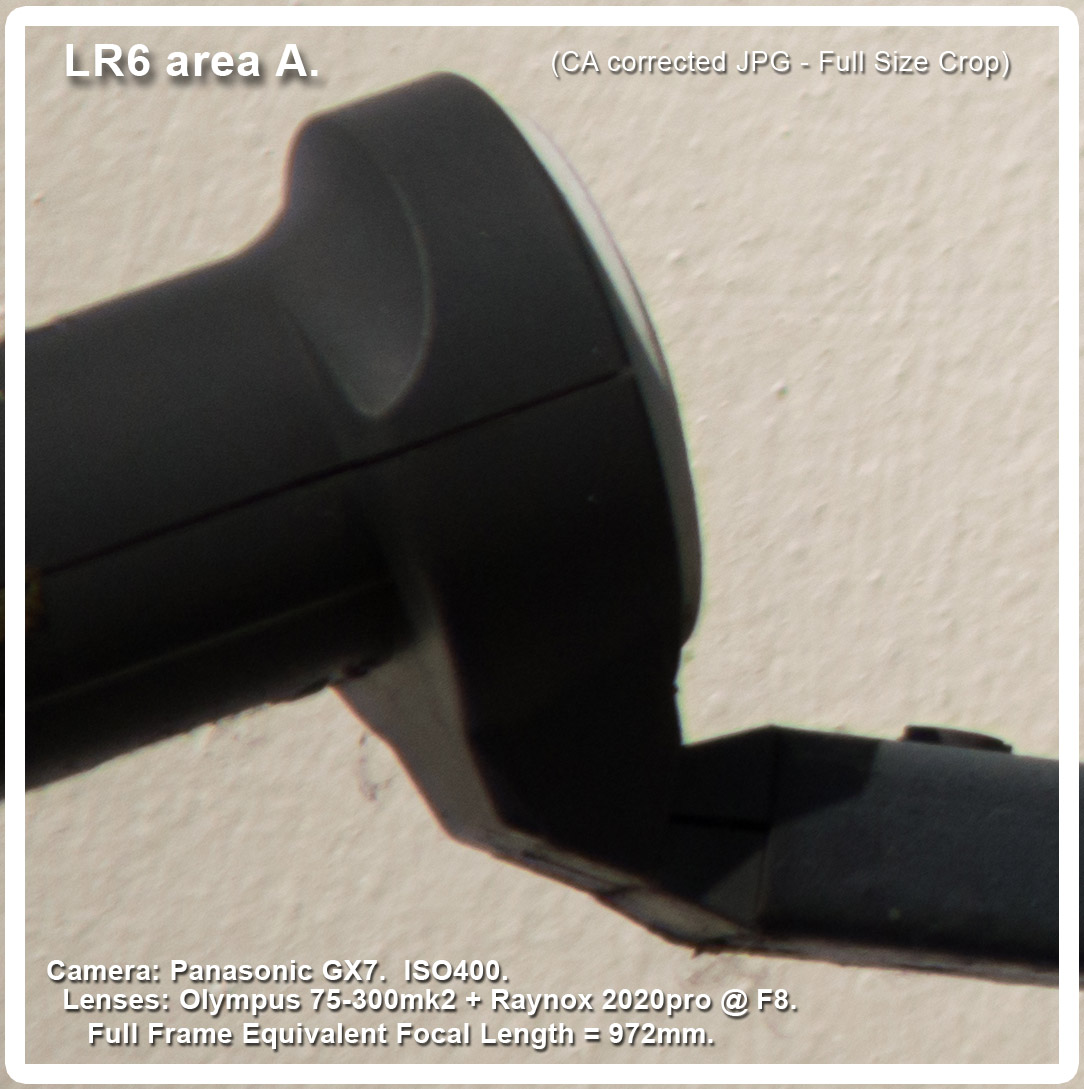
Conclusion: I have always thought that the Olympus 75-300 Mk2 was a terrific bargain, whose price belies its optical quality. Even so I did not expect it to be good enough to work with the Raynox 2020 attached, but how wrong I was. This combination provided terrific reach and accurate focus, thus enabling me to capture small birds in far away branches with very acceptable results. The combination isn't perfect, but used correctly in the right circumstances it is able to produce more than acceptable images. Introducing Chromatic Aberration: The following set of images were from one quick snap of our old satellite dish, taken the very first time I fitted the Raynox 2020 to an M43 lens (my Olympus 75-300 Mk2) to see if it would work at all. And the result provides a good introduction to Chromatic Aberration (CA) in the system. I can not remember if at that time the Panasonic cameras were programmed to remove CA from Olympus lenses using firmware, but in my experience the Olympus lenses always seem to perform very well in this respect even without any extra software processing.
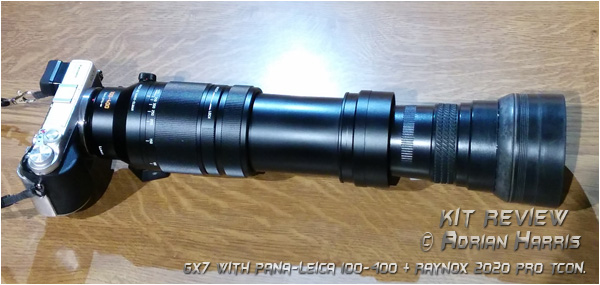
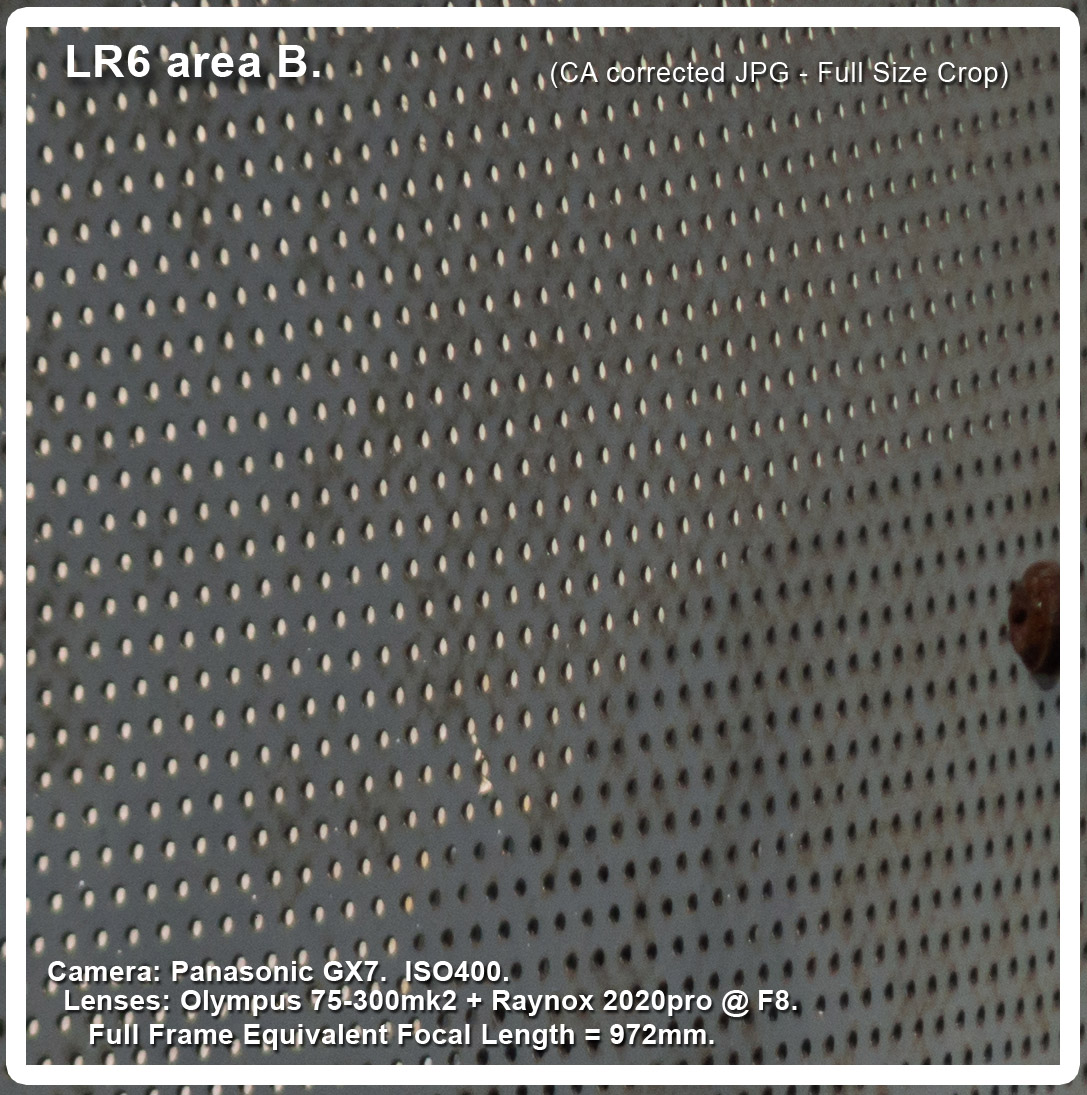
Once again Chromatic Aberration can be a problem and ideally needs to be processed out as shown above, but it is a price worth paying if it allows the user to get images that would otherwise be out of reach. One other small point of note to bare in mind is that this 2.2x Afocal teleconverter will also double your minimum focusing distance, which on the 75-300 was a bit of a nuisance at times when the birds came close! The Olympus 75-300 Mk2 lens quality at full zoom is absolutely fine with the converter at F7.1. But with this long reach the depth of focus is very small unless the lens is stopped down, which is why I shot these photos at F8. Raynox 2020 + Panasonic 100-400: Well this was the big test, because as far as I am aware there is currently no other way to achieve this amount of long zoom reach from an M43 lens setup that will still autofocus fast and even in poor light. With the potential of a full frame equivalent focal range of 1,760mm on tap, this was just far too tempting not to at least try. But would it be any good?
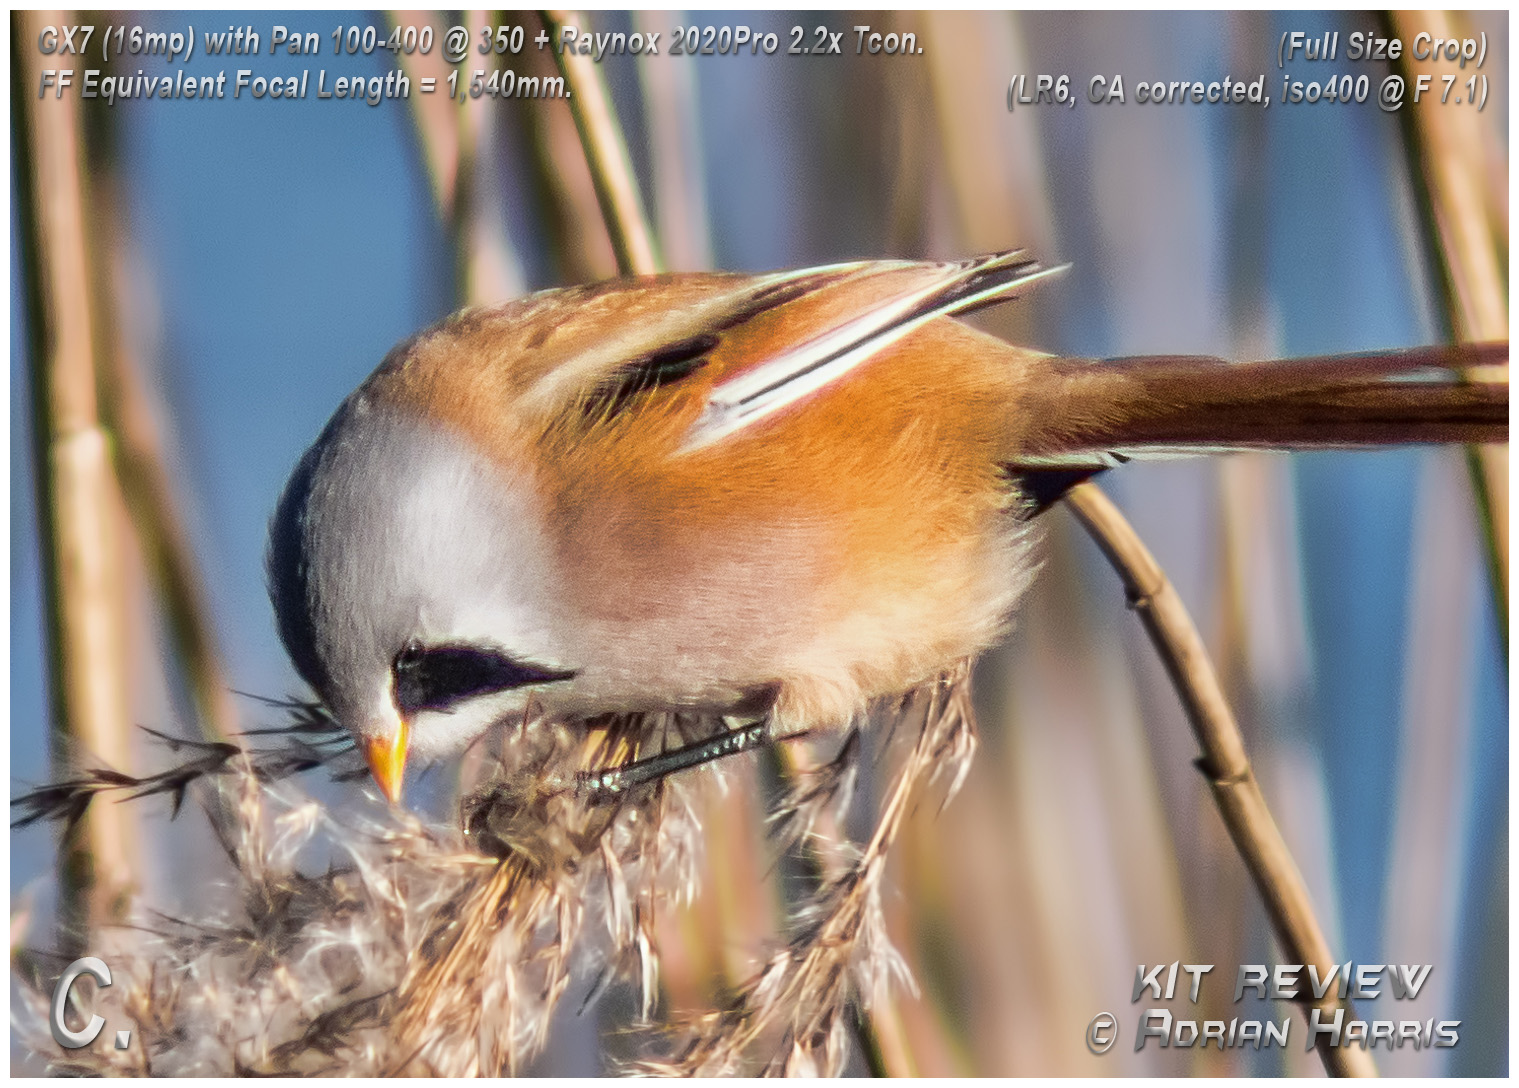
So is there any useful gain at all to be had with this 2020 + 100-400 combination? The Panasonic 100-400 and Raynox 2020 Pro is not a terrific combination for general usage, and it can be very difficult to process the resulting image to achieve a useful gain. But as it is currently the only game it town if you need a huge amount of magnification that will autofocus, let us look more closely to see the pros and cons and if we can gain a worthwhile improvement over using just the 100-400 by itself... Note: All photos on this review page are handheld, even those at FF equivalent of 1,760mm !!!
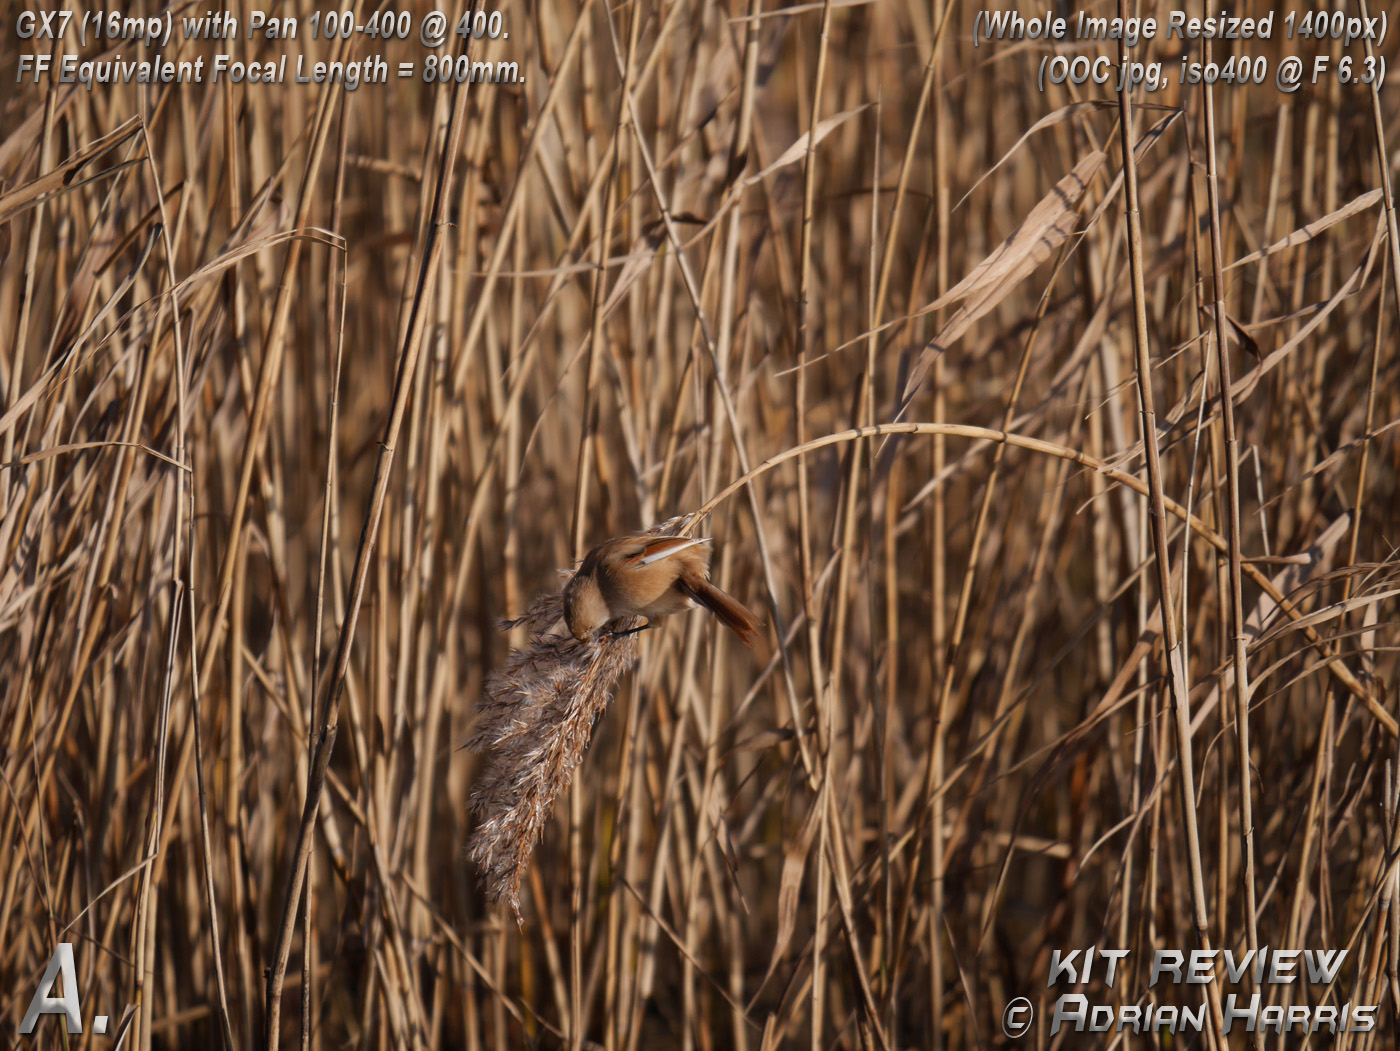
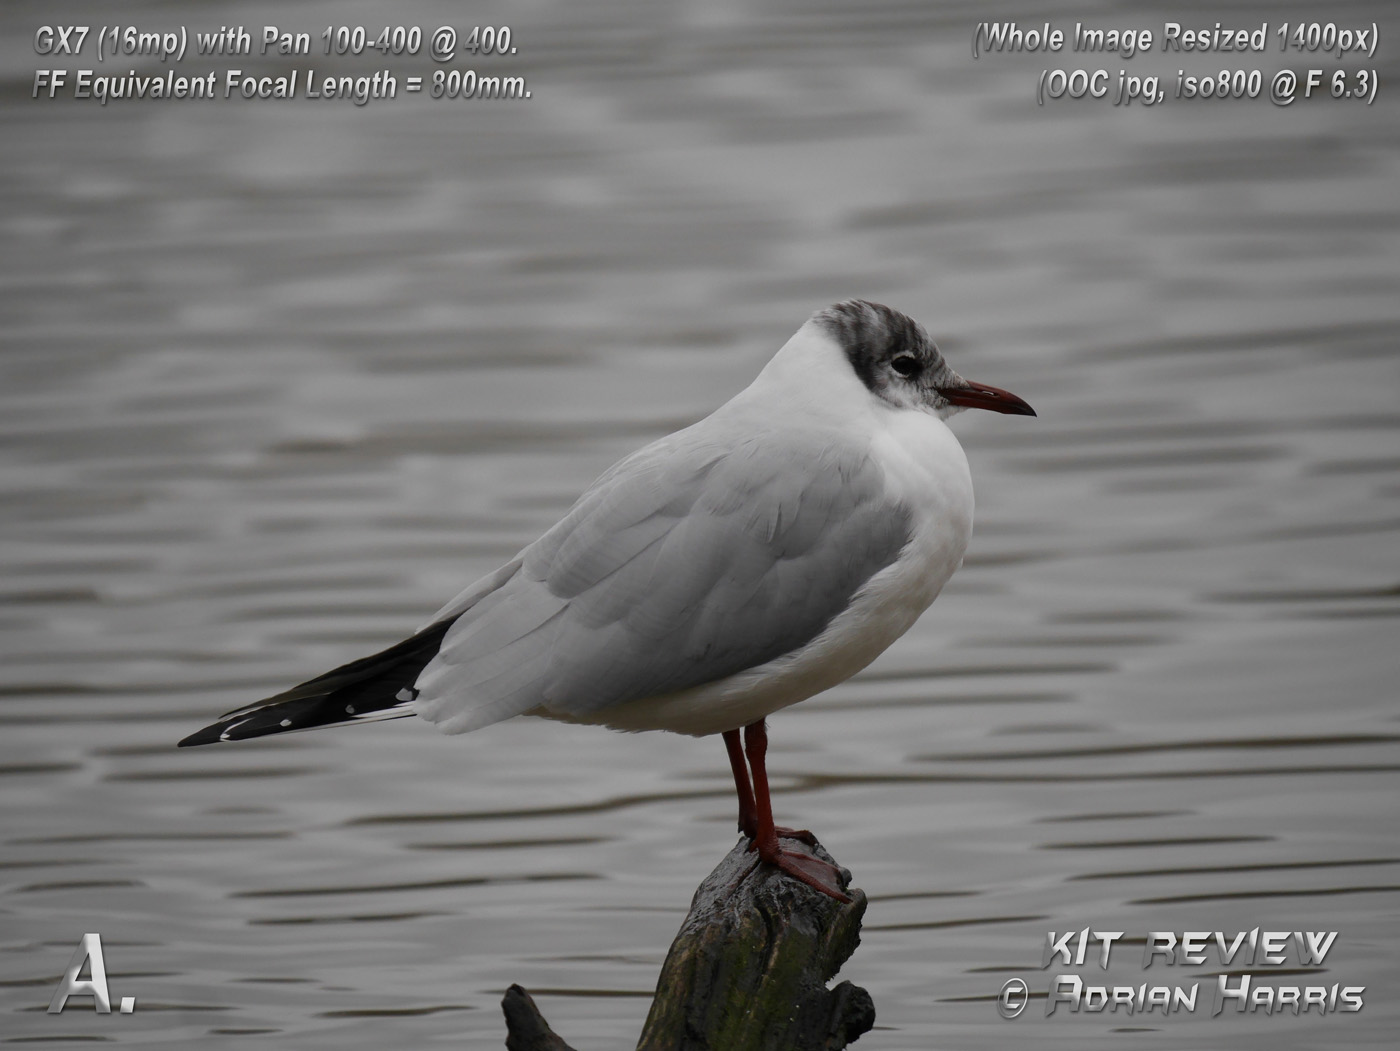
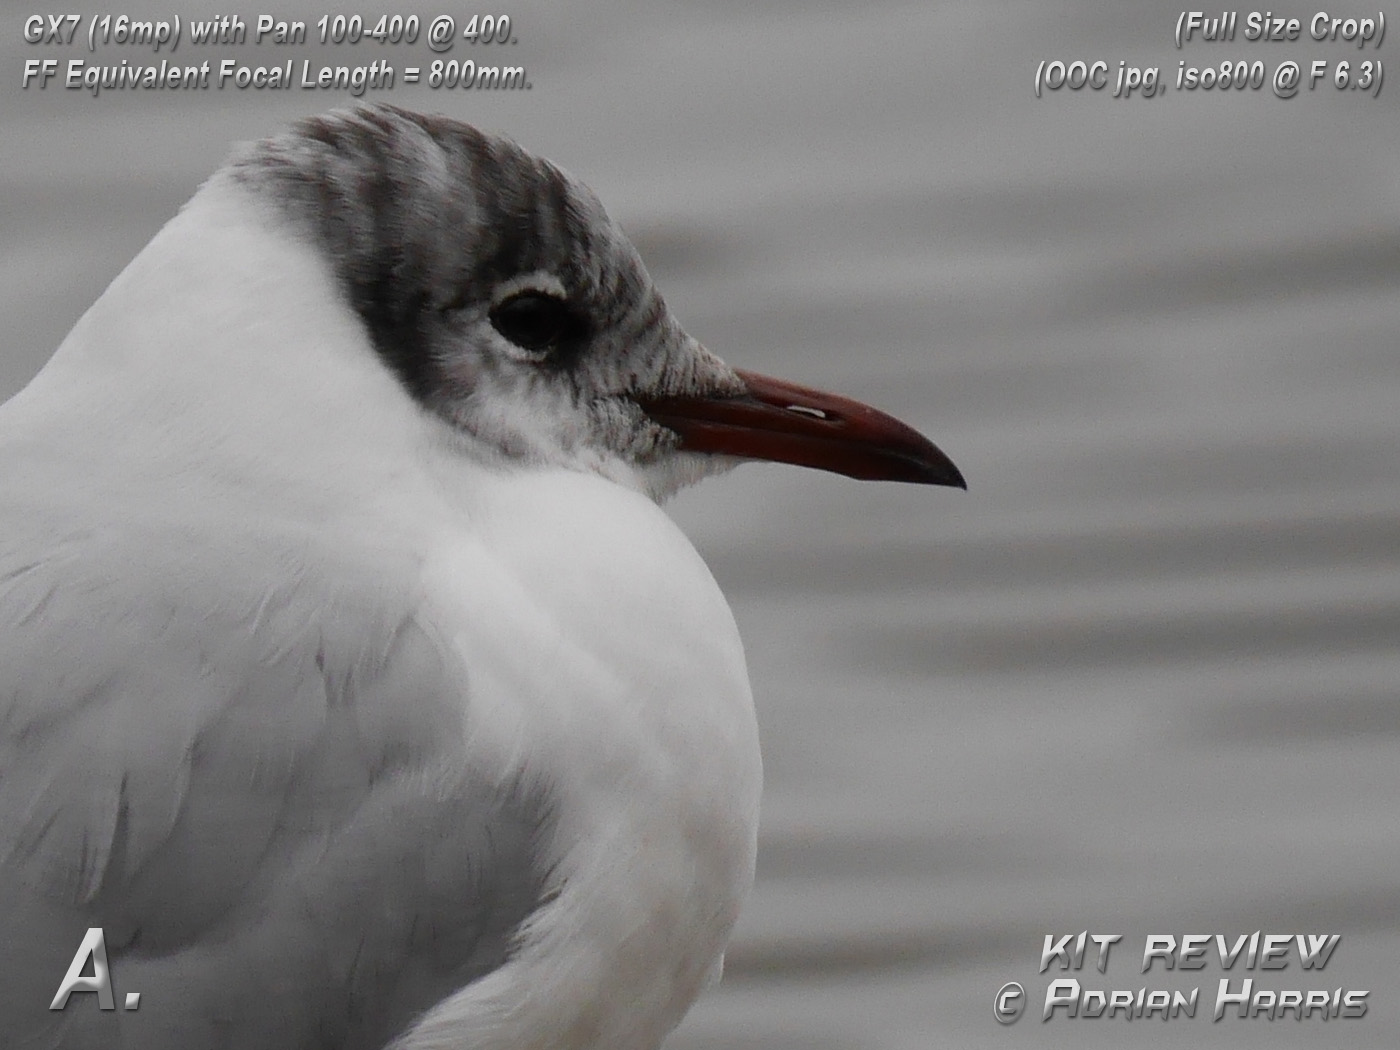
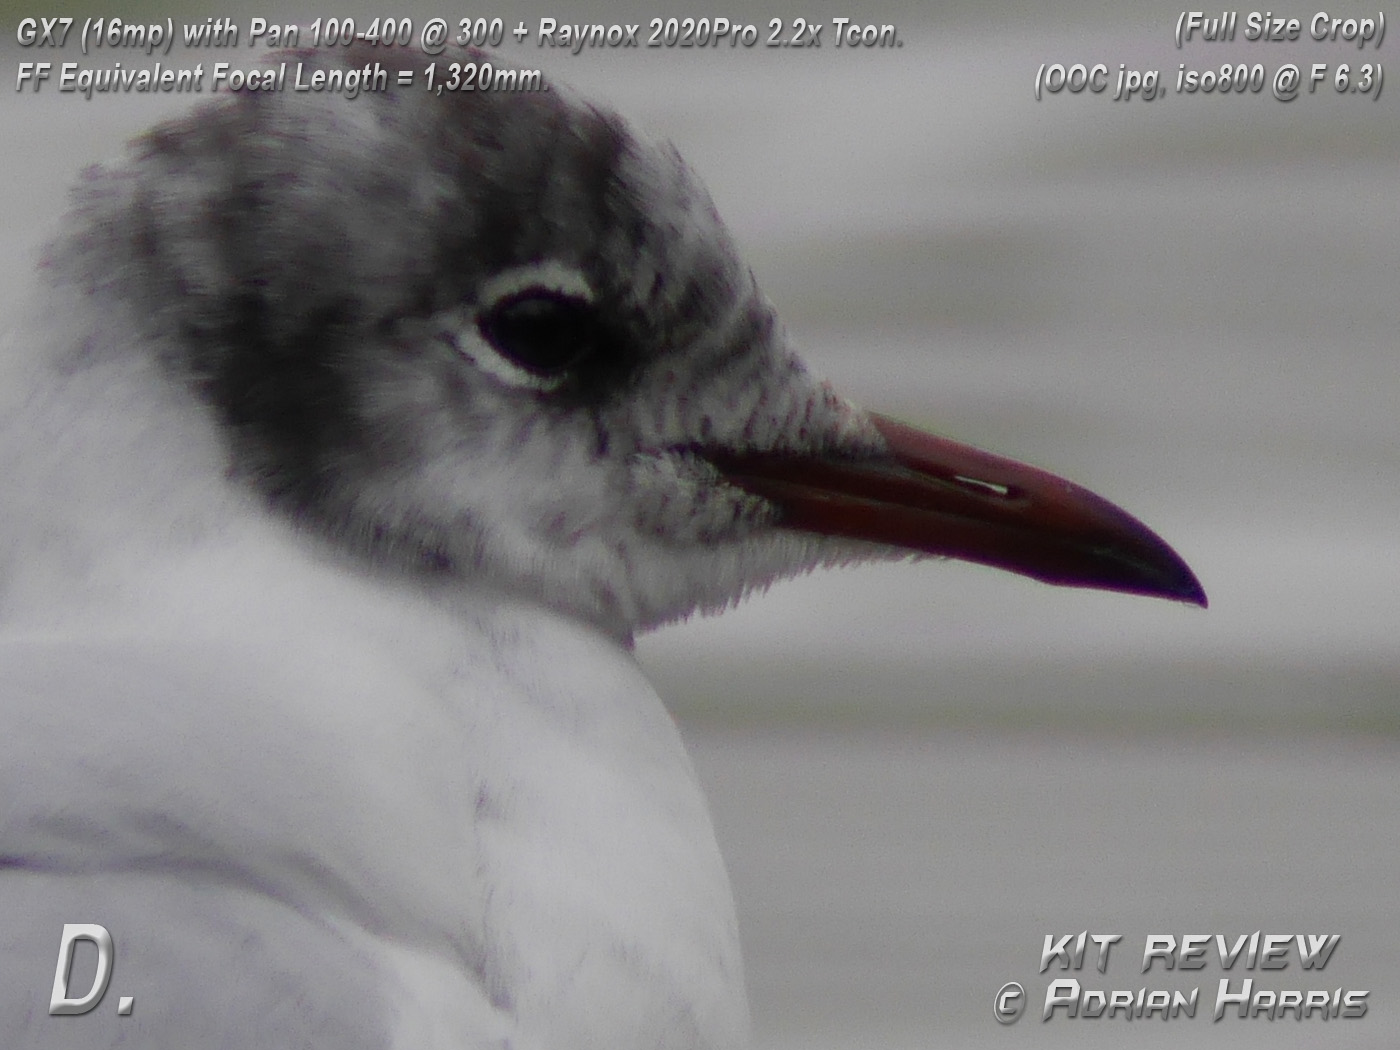
A practical test !!! Birds in poor light in a very strong wind is definitely not the best conditions for scientific testing of lenses, especially as they don't sit still either. However these weather conditions are typical in the UK and birding is a typical usage for this type of setup. So as this gull did at least stay on the log being blown around for long enough for me to fit the Raynox 2020 teleconverter and try lots of focal lengths, below I present the results...
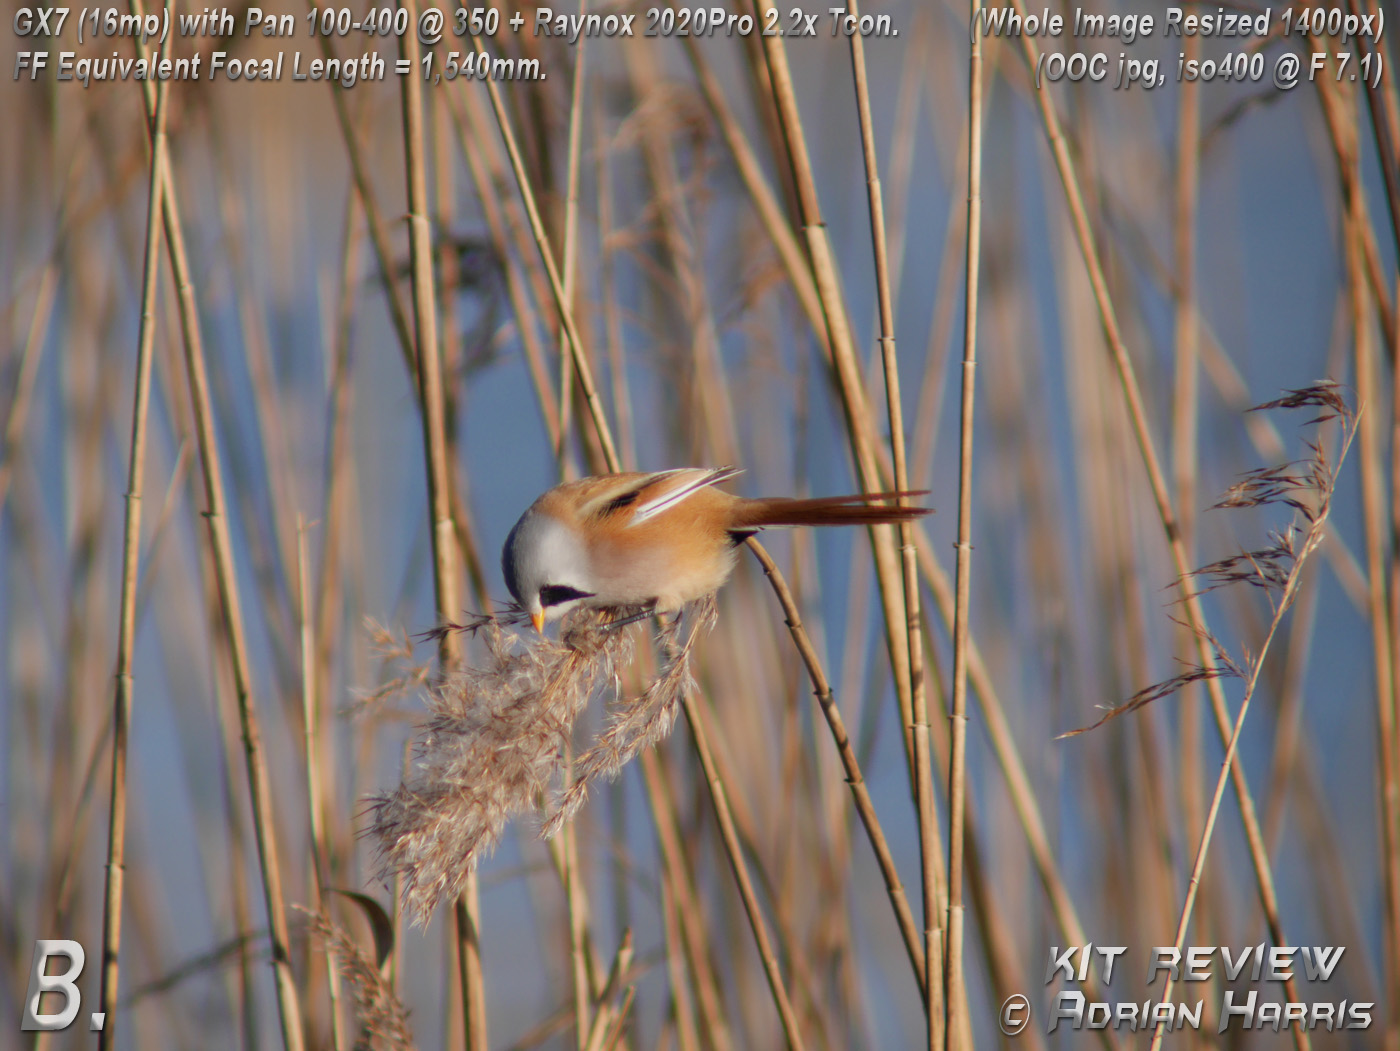
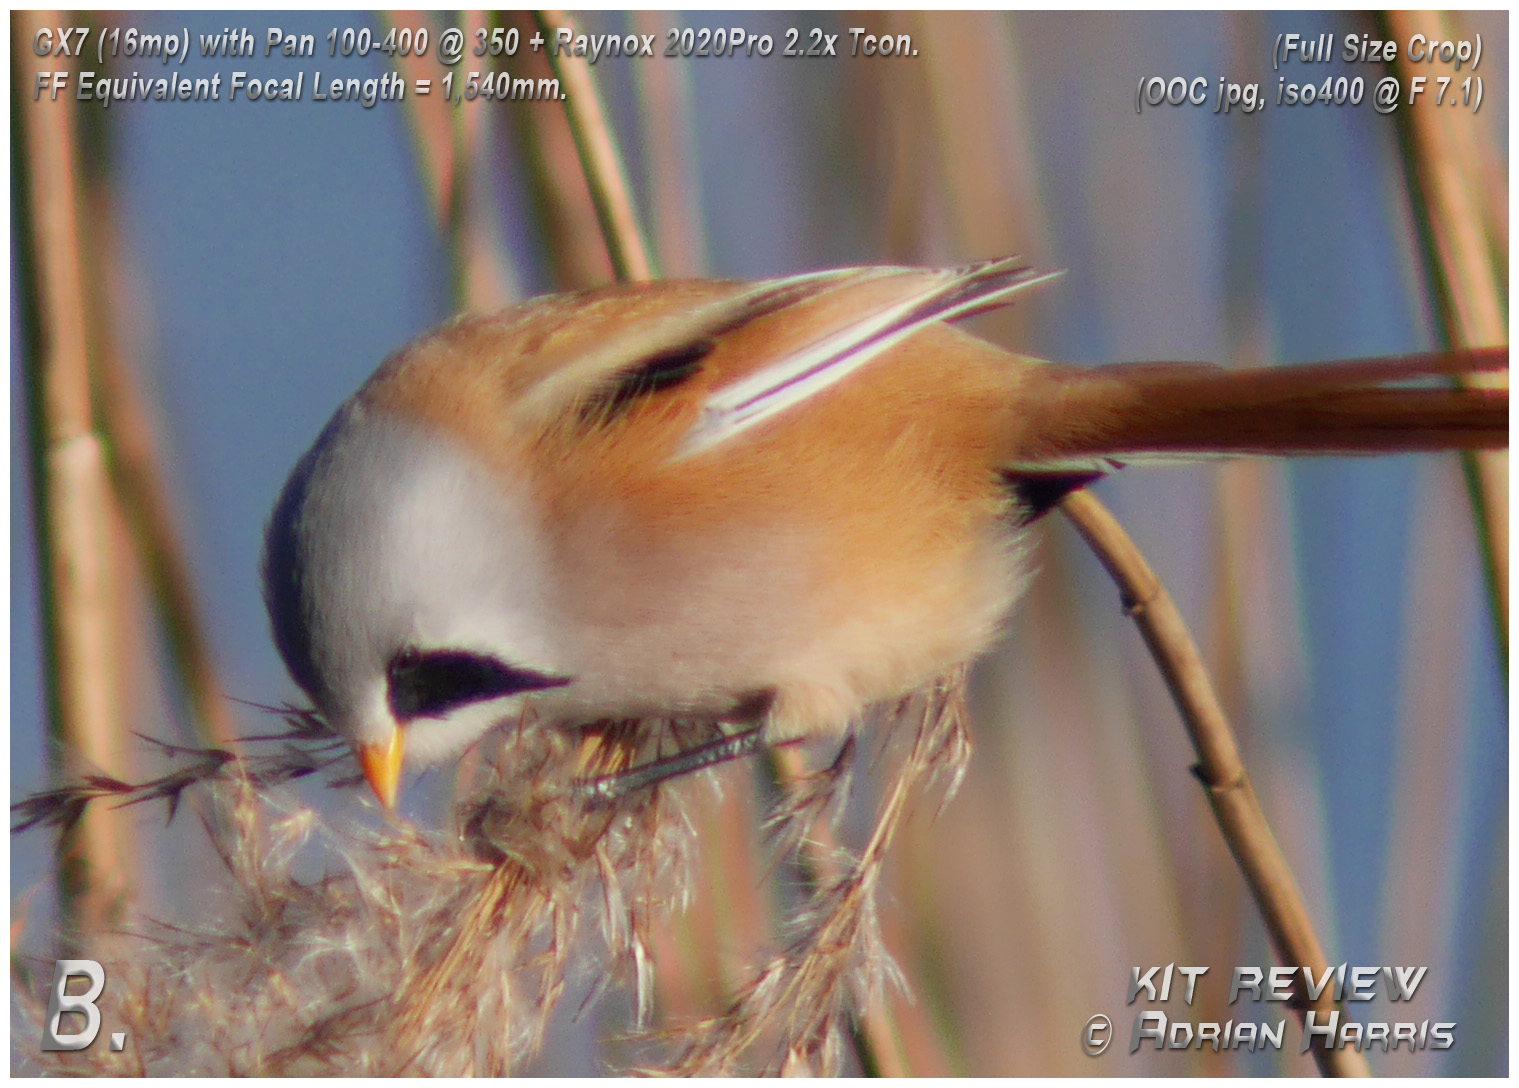
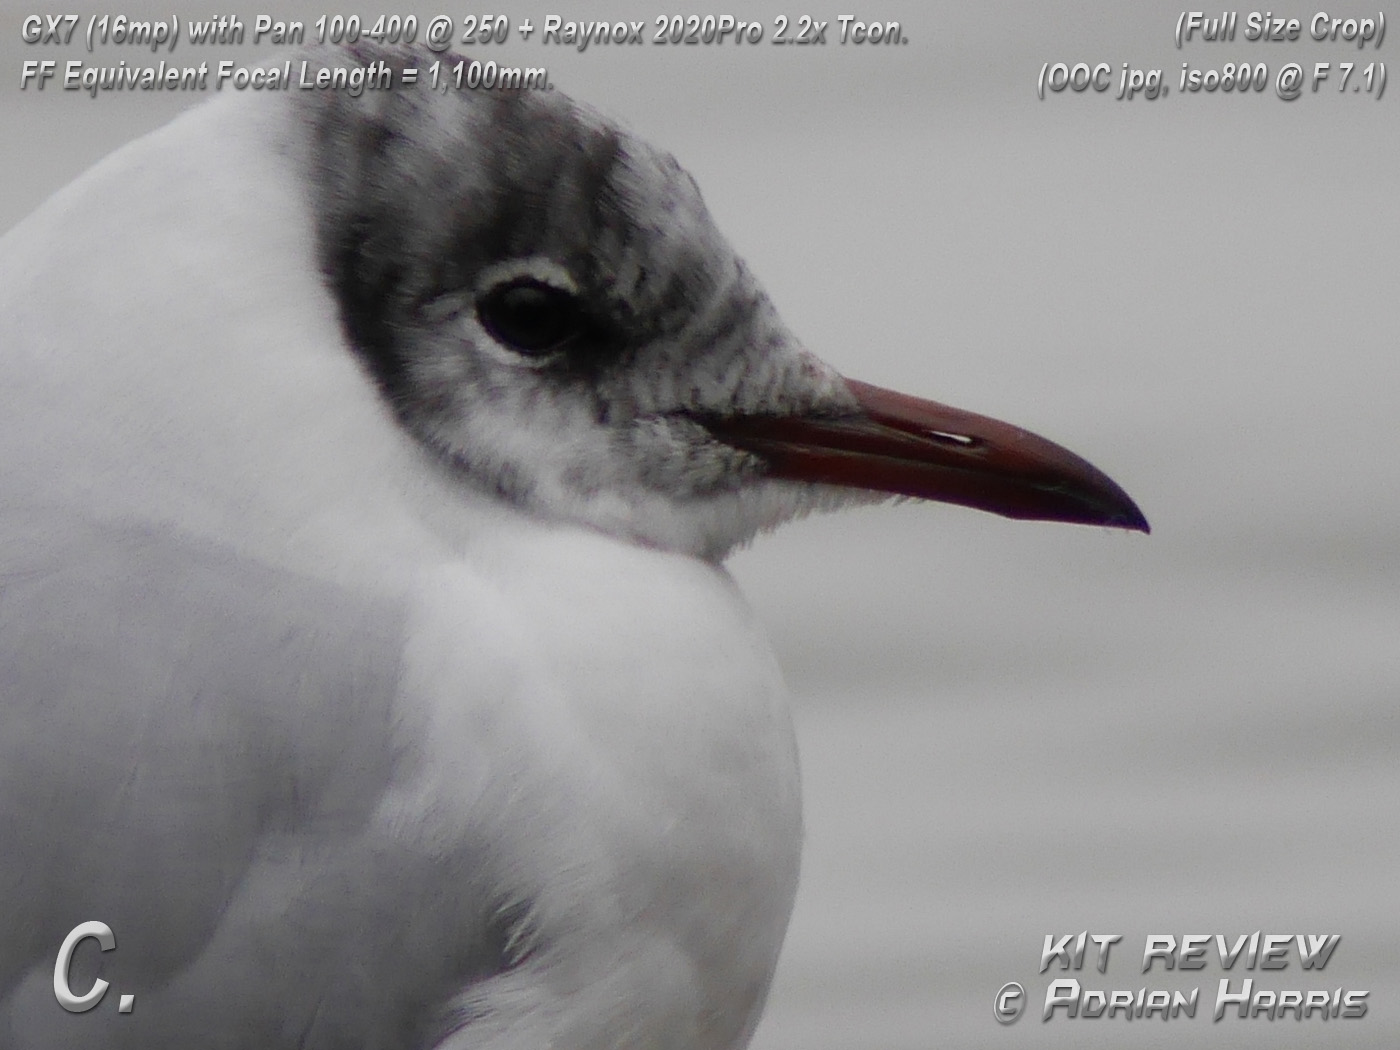
Example A and B above does show quite clearly that even with small zoom increases, more fine feather detail can be extracted than when the Panasonic 100-400 is used by itself, but detail isn't everything and colour casts and CA are already starting to appear. These aberrations are fairly easily to control at this level of zoom during image processing. I normally use LR6 for Purple Fringing and PT lens for CA, but many programs are available with features for image correction. The following examples - some of which
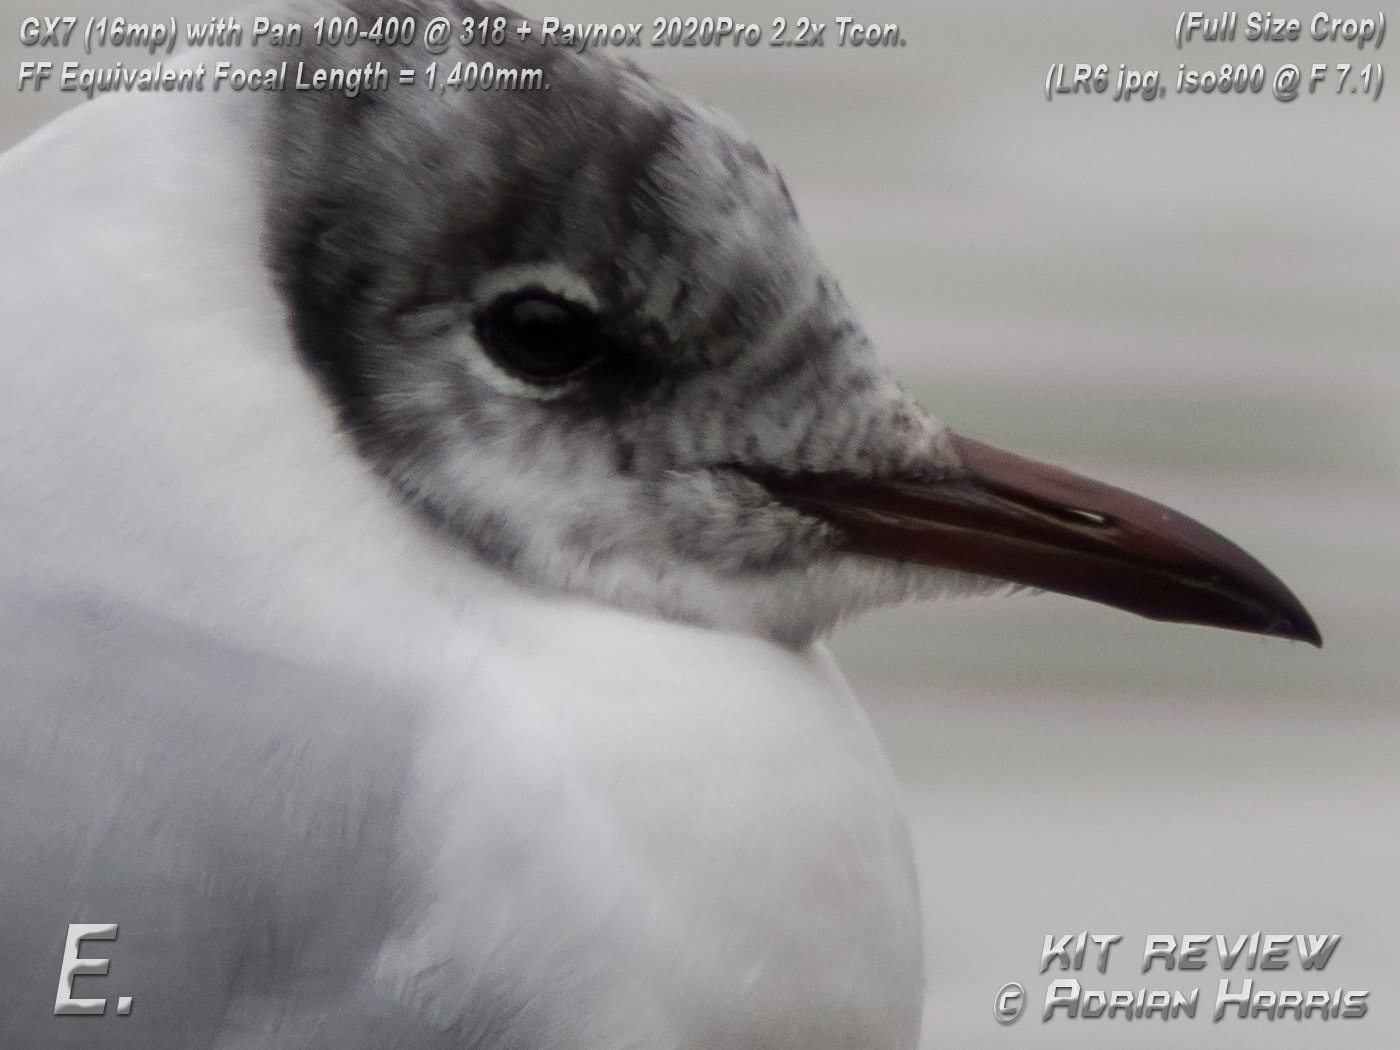
are OOC (out of the camera) and others are (LR6) processed, - show how
things progress when the zoom level on the 100-400 is increased with the
Raynox 2020 pro attached.
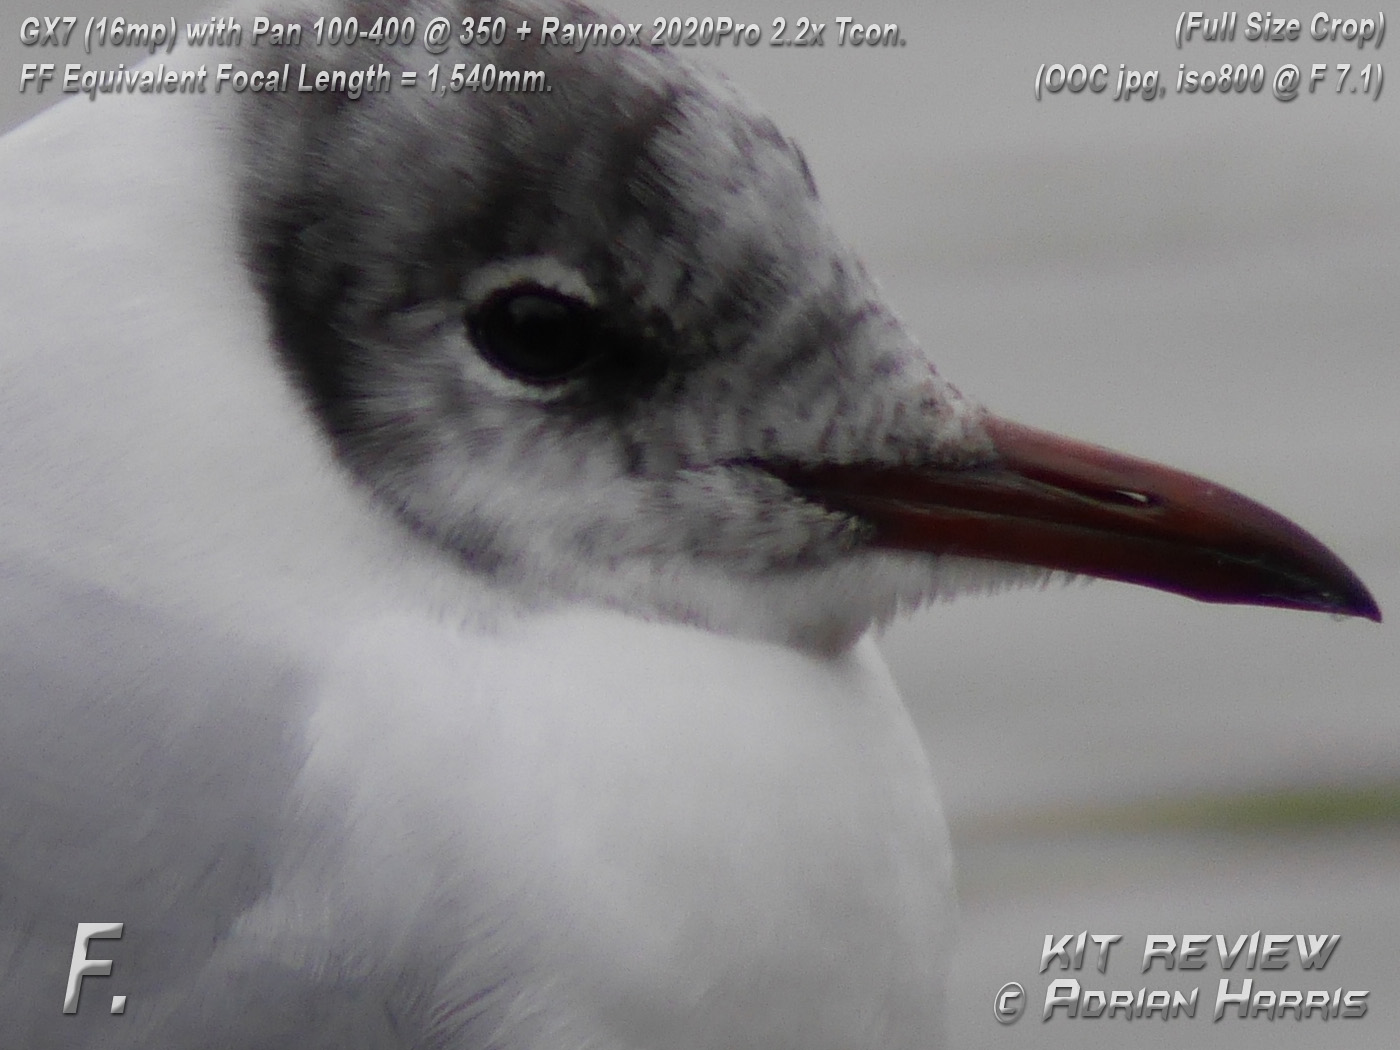
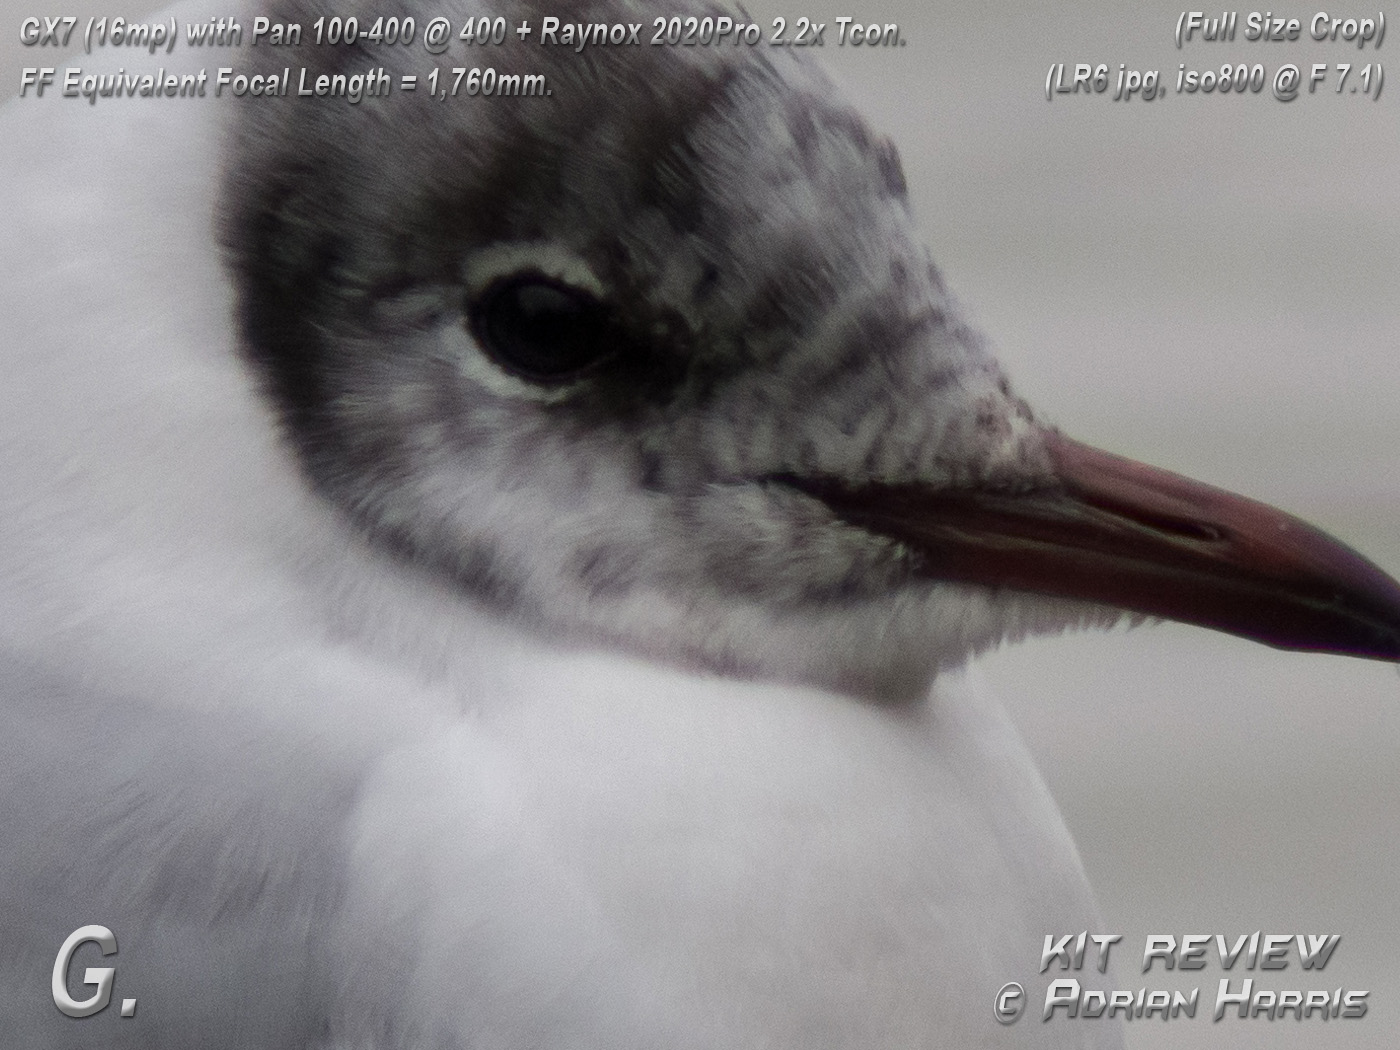
Analysis of the Gulls: Wind blowing the feathers and the gulls head and body moving position from shot to shot unfortunately changed the shadows which enhanced feather detail, thus accurate analysis is difficult. But I think it is fair to say that despite the reduced contrast in the teleconverted images, improvements are there to be gained quite easily and with very little work especially when shooting with less than maximum zoom. At these ultra-long zoom lengths many factors affect image quality, not the least camera movement. These were taken handheld sitting down using a Panasonic GX7 which does not support the Dual IS feature of the 100-400 lens. However in my opinion the camera did an excellent job. Lo-CA or Longitudinal Chromatic Aberration rears its ugly head... This 2020 + 100-400 combo suffers two very horrid faults, one of which is difficult to deal with - Purple Fringing, - and the other - Lo-CA - which is virtually impossible to do anything about. And no this type of CA can not be programmed out or corrected in software, ...by Panasonic or anyone else! Lo-CA arises when the light rays from objects in front of and behind the focal plane are not corrected optically, which unfortunately means that objects behind tend to have a coloured glow around them and objects in front have an opposite coloured glow around them. ...The actual Lo-CA colours that appear front and back varies with different lenses depending on which colours the lens designers have optically corrected for. See below for an absolutely horrid example...
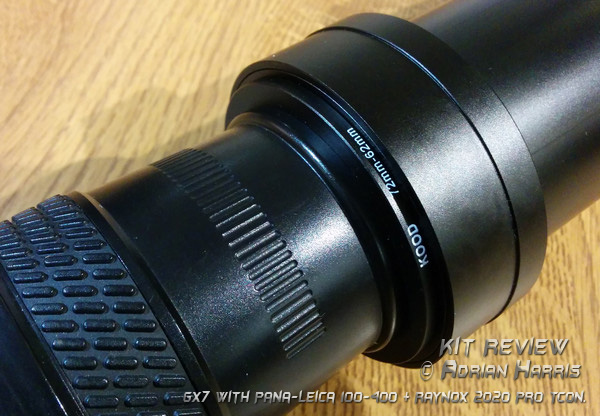
Notes: A) WARNING: As afocal teleconverters
are front mounted and can be heavy, they can place additional stress on
the primary lens and camera/lens mount if not handled correctly. As such
great care should be taken when in use. B) A front mounted teleconverter will increase your minimum focusing distance. In this instance the Raynox 2020 Pro will more than double it. IE. If the previous minimum focus distance = 2metres, then it will now be 2metres multiplied by 2.2 = 4.4metres minimum focus distance. C) Afocal converters (wide angle and teleconvertrers) usually work far better on small chip cameras than on APS-C or FF. I was very happy ten years ago using this Raynox 2020 Pro on a 28-200mm Minolta A2 bridge camera and would be very interested to see the results of using it on a modern 1,200mm zoom Bridge camera! D) When using long lens combinations I would heartily advise using a monopod, they are inexpensive, weigh very little and can aid stability when shooting distant subjects considerable. I have attached a strap to mine (using a couple of zip-ties) so that I can sling it over my shoulder for convenient carrying. And there has been a noticeable improvement in the sharpness of photos I have taken - especially when stood up, - since I have been using it. Advantages: A massive advantage of front mounted afocal teleconverters is that instead of slowing or stopping your cameras autofocus (like rear mounted ones do), it actually appears to speed it up and provide more accuracy! Unlike rear mounted converters, afocal teleconverters do not magnify any existing lens errors. I fact it is the lens that will magnify any teleconverter error. Much more fine detail can be captured when the subject is optically magnified, which is detail that no digital magnification can 'magic up'. Disadvantages: Afocal teleconverters are much bigger and bulkier than rear mounted teleconverters. Lo-CA and Purple Fringing are the two worst features that can rear its ugly head and if not possible to deal with, can ruin what may otherwise be a very good image. It may be tricky finding an optically good afocal teleconverter that works well with your lens... Many so called 'Pro' or 'HD' afocal teleconverters advertised on Ebay at low prices, really are just paperweights in disguise. Sadly I know because I have purchased quite a few and should have learned quicker to have bought a good one in the first place. I now have quite a box full and which I would not dream of trying to sell to anyone. Having said that, I have a few wide angle afocal converters from Minolta, Olympus and Nikon, which do work very well. But beware of the ever tempting Fisheye's, many only work well when fitted on certain lenses and usually only very small sensor cameras! CONCLUSION - So is it worth buying a Raynox 2020 Pro? Well I was lucky in that I already owned - and have used - the Raynox lens on test for over 10 years. It has been fitted to many bridge style cameras and with great success for birding, dragonflies and butterflies. So it was in my kit drawer already and I am not sure how much they currently cost. But assuming that you already have one of the lenses on test and need far more magnification without too much expenditure and you posses some processing skills, it may well be worth considering. It is so light I am always happy to carry it in my kit bag. And when fitted to the the two Olympus lenses on test I now know how to achieve very beneficial results. If you already own the Olympus 40-150 F2.8 pro and need to go longer, I would first advise get the Olympus 75-300 Mk2, because it has double the focal length, is relatively inexpensive, very sharp and has almost no vices, barring slightly slow to focus (in comparison with Pro lenses) and slightly less contrast (also in comparison to Pro lenses). If you already own an Olympus 75-300 Mk2 and want a large focal length increase, but do not have the big budget necessary for a Panasonic 100-400 lens, then the Raynox 2020 can provide an alternative as long as you can live with its limitations: Reasonably good light may be needed as the optimum aperture I have found with the Raynox attached is F7.1 and F8. The focus is fast and very accurate, but the resulting image does lack contrast which is easily correctable, but many may suffer from PF and CA - especially at full zoom - which will need processing to good effect. From my experience I would be far more reluctant to recommend the Raynox 2020's use on the Panasonic 100-400 unless you either have good processing skills, or are prepared to spend a lot of time learning how to get the best out of it. Even then it will only be really suitable on certain types of images and in certain situations. Getting closer with the 100-400 on its own will always be the best option by far. However in M43, if you want a the longest zoom reach currently on offer, that is practical to use in the field and are prepared to do some post processing work on the images to get an acceptable result. Then using the Raynox 2020 Pro is currently the best setup I have found for increasing my telephoto lenses focal length. If anyone has a better system that will autofocus fast, I will be very envious and also pleased to hear about it. Article © Adrian Harris
|
 |