Non-Linear and Off-Centre CA distortion
(CA = Chromatic Aberration)
Although CA correction programs do a truly excellent job, many do not allow for
off-set CA distortion or Non-Linear CA distortion. Both of which are normally
present on inexpensive, lenses, wide angle lenses, add on wide-angle/tele-converter
lenses and also some close-up powerful dioptre lenses.
Unfortunately I seem have a fair share of the lenses mentioned above in my
collection and hence am concerned about the correction of this type of optical
fault, to get the best out of them.
Testing for Chromatic Aberration distortion in
lenses and lens combinations...
For these tests I used 2 tremendously fun to use and very inexpensive lenses
(which I will not name), but both suffer from CA quite badly and one is amongst
the worst optically performing add on tele-converter lens I have seen. But at
the right times both have gotten me some wonderful images.
Also needed for these tests was a sensible optical target to produce images that
could be evaluated accurately. Outside light is poor at the moment and also the
time required to find a suitable scene was not a practical option. So the Adrian
Harris Mk1 CA
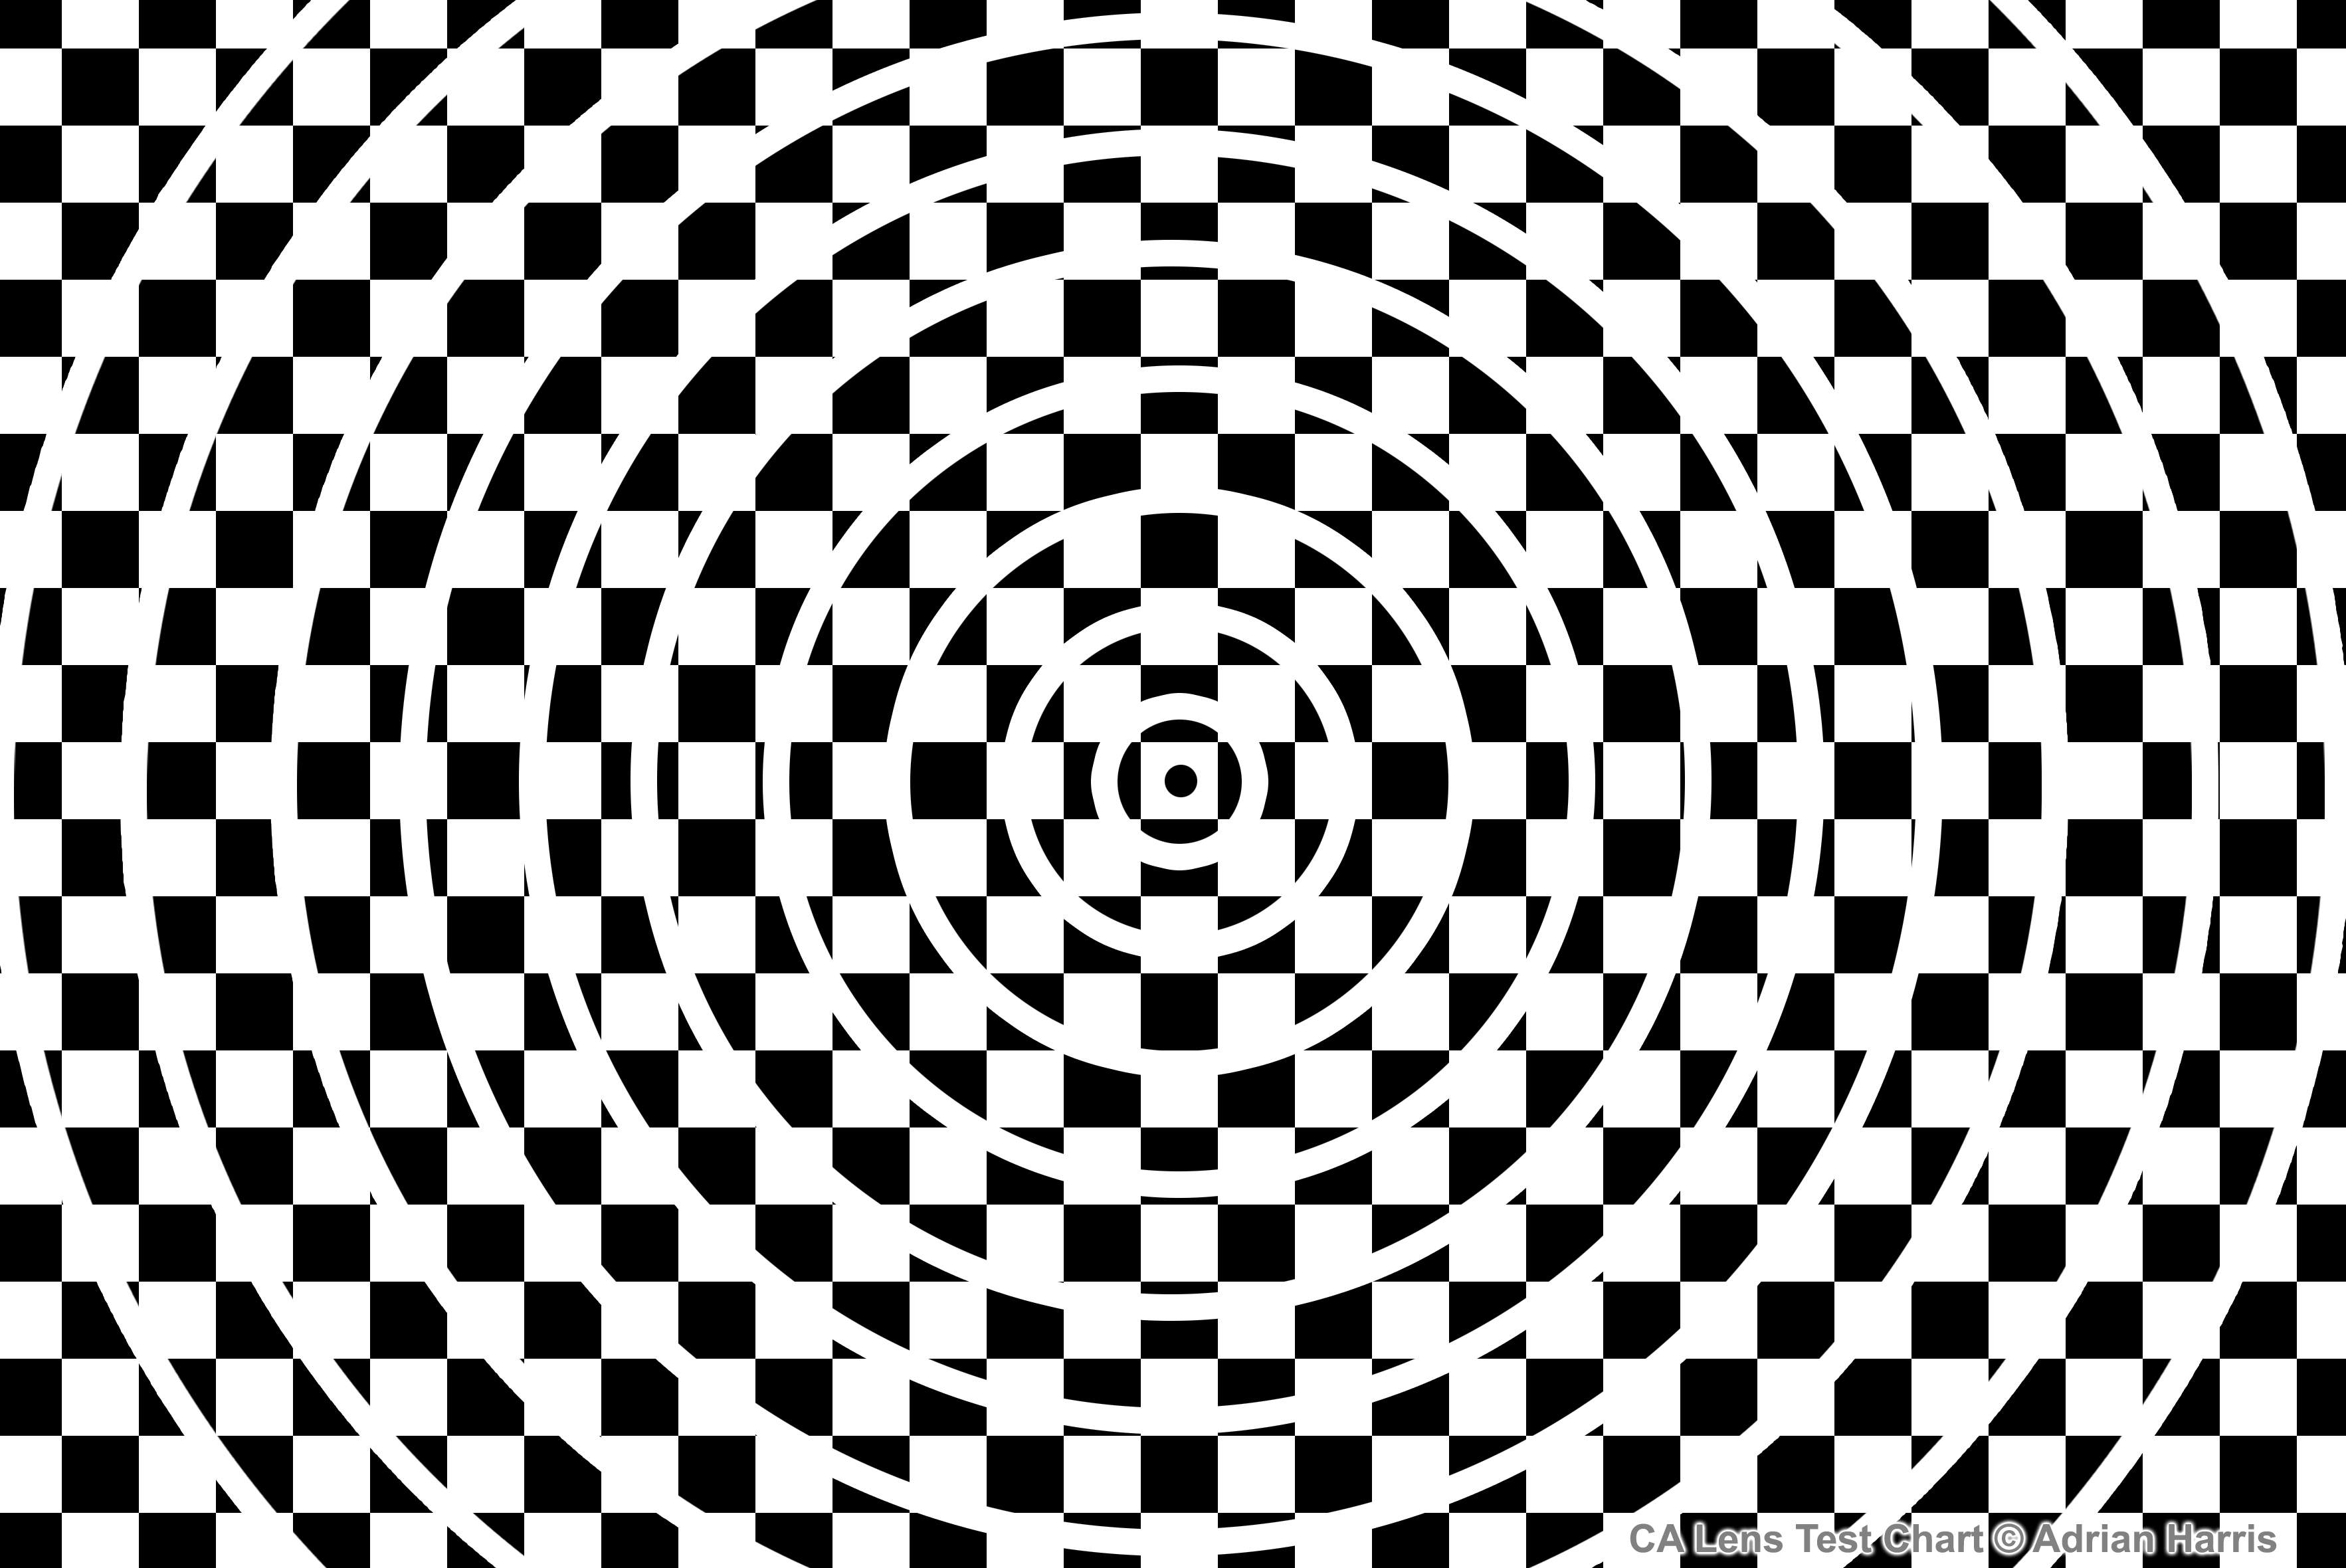
distortion Evaluation Chart was created. The chart consists of black and white
squares and circles which will show up colour shift and direction, clearly and
quickly at a glance.
Fig1:
CA distortion Evaluation Chart - for
checking lenses

Click
HERE to download the full size chart for your own testing.
You will need to print this chart out on at least A4 size
high resolution photo paper.
For the tele-converter lens test, the target was setup about 3 metres away and
mounted facing the camera as squarely as possible (IE. At 90 degrees to line of
shot), this is to try and avoid focus and parallax errors.
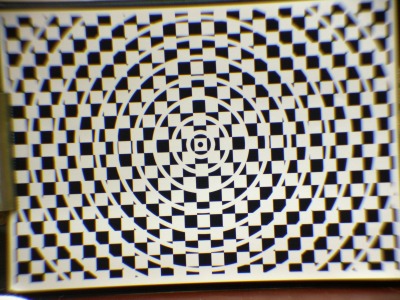
The camera was tripod mounted and shots were taken at F3.5, F5.0 and F8 for
comparison. As expected images improved with stopping down, but for real world
usage on this small chip camera I favour big apertures whenever possible. So am
posting the F5.0 image for readers to see the horrendous amount of colour shift
towards the edge of the image.
Fig2: Photo of test
chart to check for CA
Yes it would have looked nicer if I straightened it but
vertical rotation will not affect the test results ;o)
Click
HERE and download the full size photo to view the faults
or try your own CA software correction tools to improve it.
My favoured CA correction program is PT Lens, which I purchased to use as a
Photoshop plug-in and on my better lenses it does a tremendous job. It is a bit
of an unfair test for an CA program to try and fully correct an image as
distorted as this, but by using PT lens it was possible to recover detail
previously totally unusable for a large part of the image.
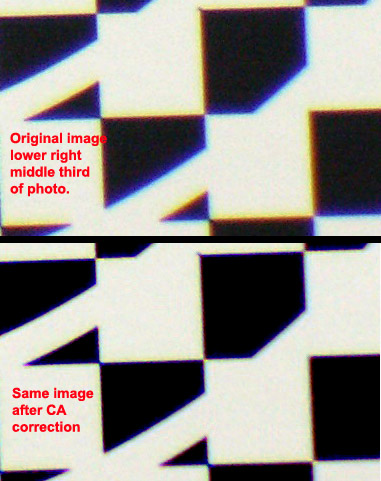
As can clearly be seen from the original full size chart photo above, only the centre
third of the image was usable. But after applying CA correction a further third
was recovered to a level quite acceptable for many uses. But the remaining outer
third of the image was still ‘not good’ as regards clarity at any level (Mind
you don’t knock it, people happily buy lens babies to get effects like this and
I certainly have some superb keepers from using this lens.).
Fig3: Before and After quick CA correction
using PT Lens
Non-Linear CA distortion
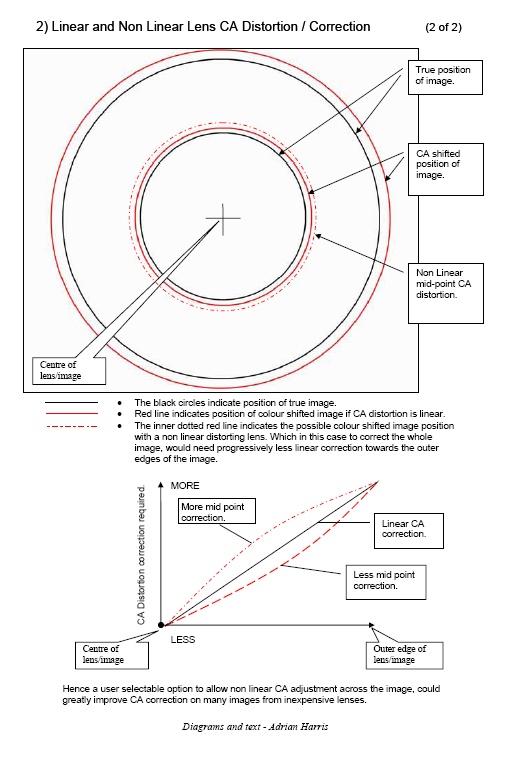
After experimenting it was noticed that if linear CA correction is applied to
‘improve’ the outer third, the perceived sharpness and correction of parts of
the image further in towards the centre appears to worsen. Which leads me to believe that CA
distortion with some lens combinations is non-linear across the image frame.
Fig4:
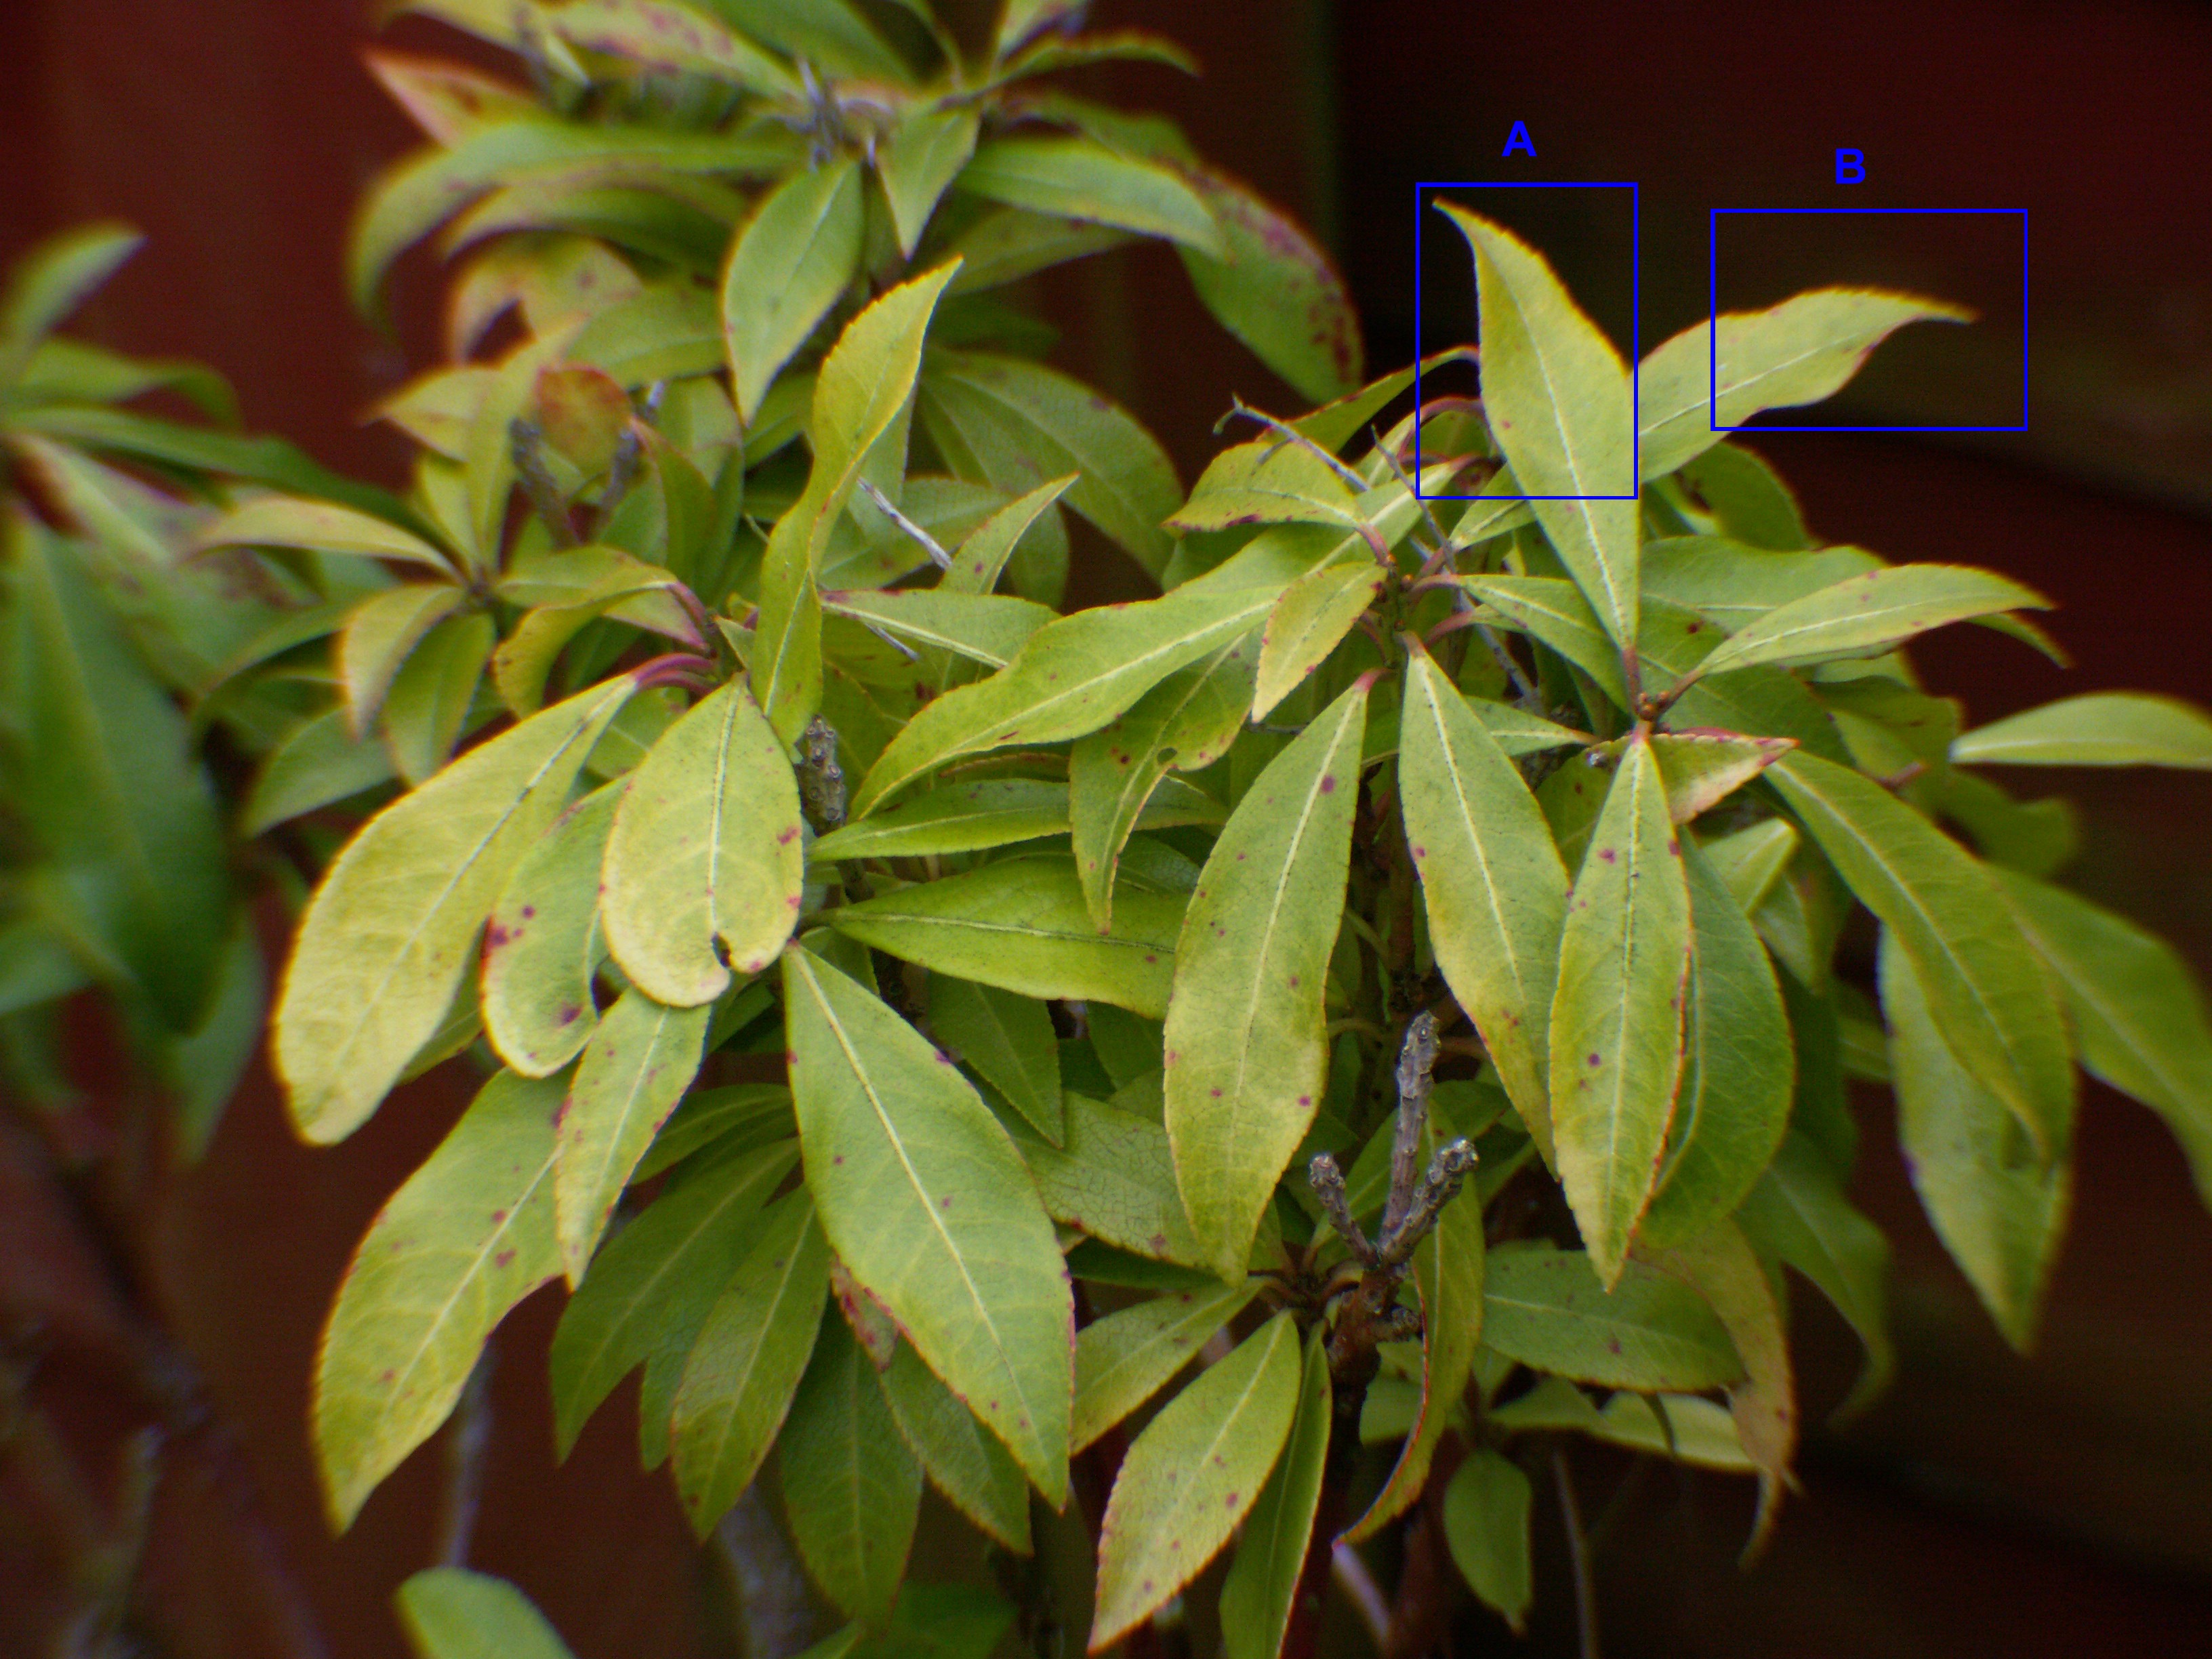
This perceived loss of fine detail towards the middle part of the photo after linear CA correction for the outermost edges, has been noticed most when photographing feathered or furry creatures (sorry no examples of birds). This effect can be seen quite clearly if you experiment yourself with this image of a shrub. If you correct for CA as best as possible for the leaf in square ‘B’, you will notice that the leaf in square ‘A’ has been over corrected.
Fig5: CA correcting leaf
in square 'B' over corrects leaf in square 'A'.
This is a small crop from the to right of the photo.

Click
HERE to download
original full size photo to experiment with your CA correction tools.
Off-Set CA distortion
Also worthy of note was that with some lens combinations, CA can be slightly
offset. IE. Not originating from the exact centre of the photo.
Fig6:
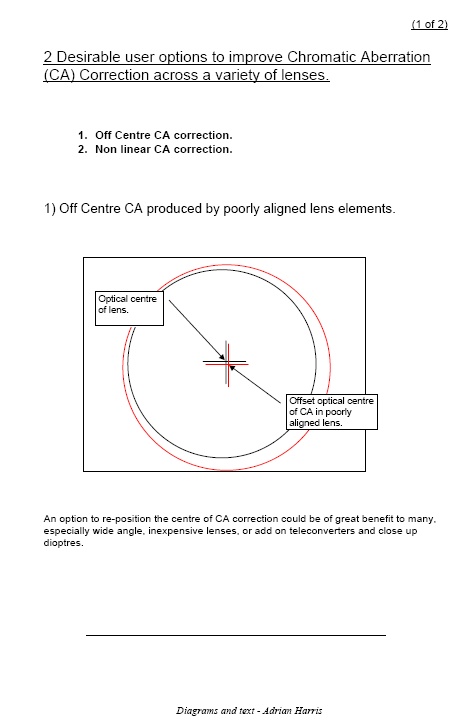
This effect is just noticeable in the photo of the CA test chart
(Fig2) if you look
closely. After correcting the bottom right third of the chart photo as best as
possible (using PT Lens the settings were approx + 35 Red/Cyan and – 50
Blue/Yellow.) I noticed some colour fringing in the top right third. Which leads
me to believe that the optical centre of CA for this lens combo is very slightly
off-set. This could of course be down to the step down ring attachment. But
whatever, it is a fault that could easily have been corrected if it was possible to
off-set the CA correction software a small amount.
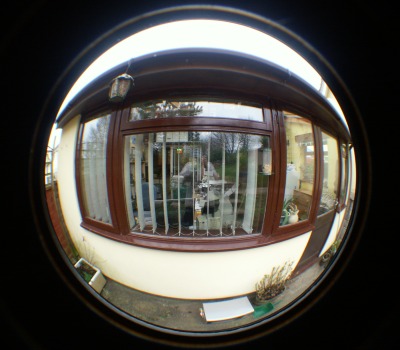
Real world testing
Just as was writing this my mailman delivered my latest toy to play with, a very
wide angle add-on converter lens and this was an opportunity to good to miss.
Although the daylight was dull grey a quick photo of the outside of my office
was snapped for test purposes.
Was actually quite surprised at the general sharpness of the lens but there was
as expected quite a degree of CA colour shift causing blur towards the outer
edges of the photo.
Fig7: Budget add-on Wide
Angle converter lens
Click
HERE to download original full size photo to try with your CA correction
tools.
Once again I played with CA
software correction to see what could be recovered and was pleased with the
improvement. However once again I noticed that when the CA correction was
optimum for the outer edges of the image (office wall and window ledge), some of
the window blinds towards further towards the centre ‘appear’ to be very
slightly over corrected. Which leads me to believe once again that user defined
non-linear correction across the image would be a desirable control to have.
Some lenses combinations may not be CA correctable…
When stacking lenses which may individually have their own and different CA
issues, it is possible that these may not be able to be corrected with any
software. - Others wise than me can comment on this. However I do know that it
is technically possible to use a matched add-on lens to improve certain CA and
distortion issues present in the main optic.
To conclude – Desirable CA correction software options…
It would be ideal and of great benefit to many photographers - especially those
operating on a budget, if CA correction software had user
defined non-linear/variable, CA correction across the image frame. It would
benefit many users if the CA correction software was able to be
set to operate - slightly off-set - from the image centre when it was appropriate to do so.
Disclaimer…
These opinions are my own and based on experience after running various tests
and taking countless photos with all sorts of lenses, lens combinations and CA
correction software tools to try and get a better understanding of how to improve
image quality.
Most importantly please note: I would like it to be known that failure to make
the very poor example images in this article perfect, is not a fault of PT Lens or any
other software I have used. The images were purposely taken with ‘very’ budget
lenses to illustrate the point of the article, which is that extra user defined controls
are desirable and can be necessary. I do own some high quality lenses, however
even some of these have slight CA issues. However the faults are often more
linear on better glass and the software I have used for the tests above does correct all those
lenses perfectly!
Article copyright - Adrian Harris (2009)